One of the main features that includes Oracle MAF 2.3 released early this week is the ability to deploy applications in any Windows 10 device.
Downloading and Installing JDeveloper 12.2.1
To develop an application with Oracle MAF 2.3 we need JDeveloper 12.2.1 that can be downloaded in this link:
http://www.oracle.com/technetwork/developer-tools/jdev/downloads/index.html
You have to download both files.
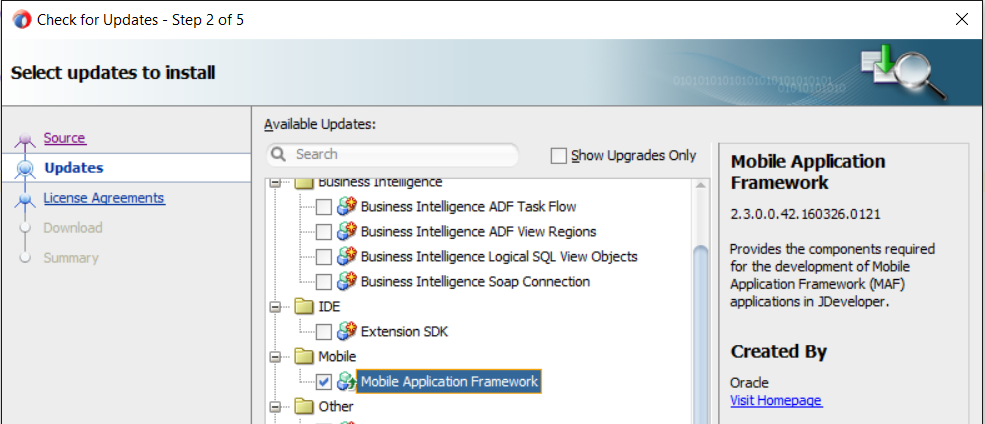
Once we have installed JDeveloper, we have to install Oracle Mobile Application Framework extension.
This is a known step for JDeveloper users, under ‘Help’ menu click on ‘Check for updates’ and select MAF extension.
Downloading and Installing Visual Studio 2015 Community Edition
First of all we have to download Visual Studio in this link:
https://www.visualstudio.com/products/visual-studio-community-vs
We can use Community, Professional or Enterprise versions
And click on download button.
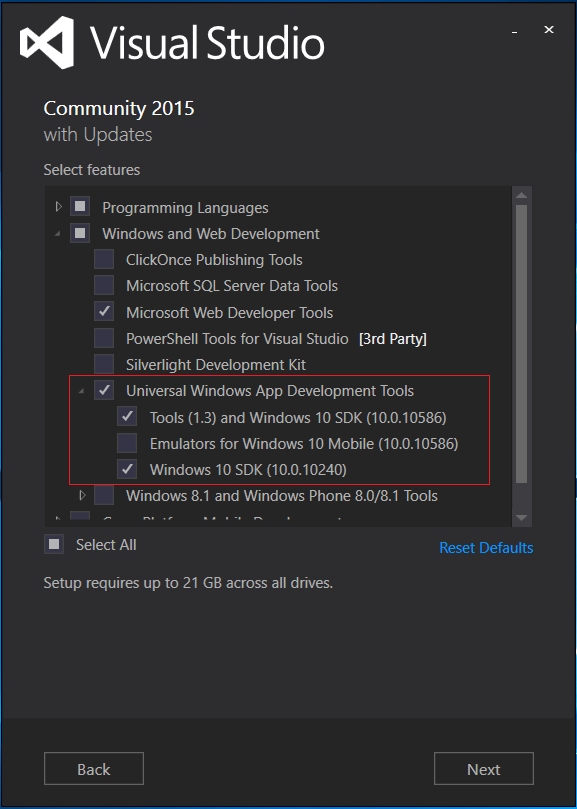
Once we have executed the installer, in the wizard we have to select this items and finish the installation.
Creating and Installing the PFX file
Now we need to create a Personal Information Exchange (.pfx file).
The tools we are going to use are in this folder:
cd C:Program Files (x86)Windows Kits10binx64
First we need to create a .cer and .pvk files.
makecert.exe -sv E:mafmaf.pvk -n “CN=Ruben Rodriguez,OU=MAF,O=rsantrod,C=ES” -r -h 0 -eku “1.3.6.1.5.5.7.3.3,1.3.6.1.4.1.311.10.3.13” E:mafmaf.cer
A brief explanation of the arguments
- -sv path of the private key
- -n name of the certificate
- -r means that is self signed
- -h 0 means that cannot be used as a CA (Certification Authority)
- -eku
- 1.3.6.1.5.5.7.3.3 the certificate can be used to sign code
- 1.3.6.1.4.1.311.10.3.13 lifetime signing
- The last one is the path of the .cer file
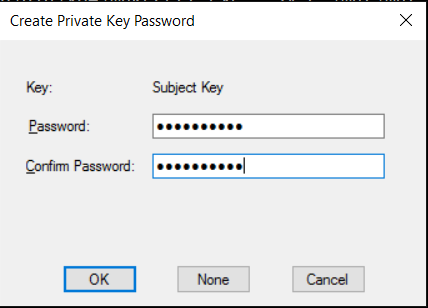
Once we execute the command, we will have to set a password for the certificate.
The second command will allow us to copy both .cer and .pvk files into a pfx file.
pvk2pfx.exe -pvk E:mafmaf.pvk -spc E:mafmaf.cer -pfx E:mafmaf.pfx -pi rsantrod -po rsantrod
- -pvk path of the .pvk file
- -spc path of the .cer file
- -pfx path of the pfx file
- -pi password of the key file
- -po password of the certificate file
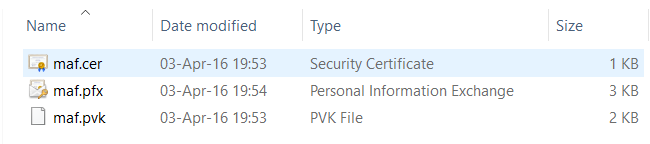
Once we have executed both command we will have this 3 files.
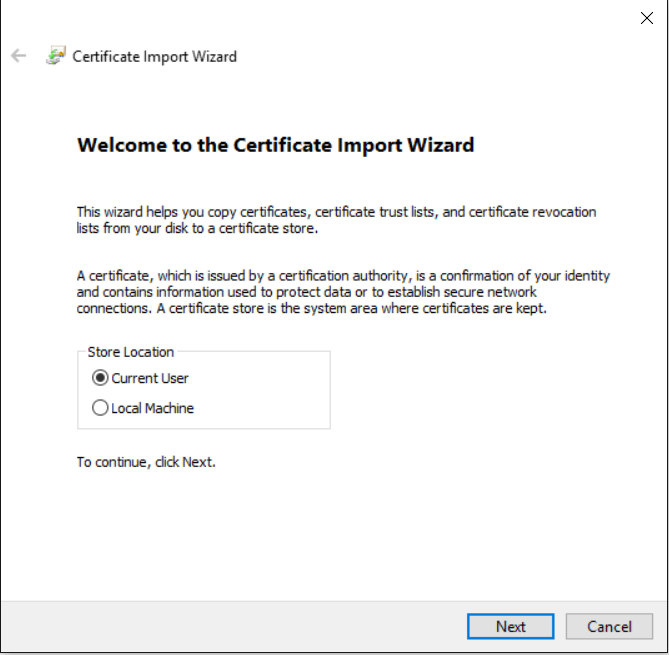
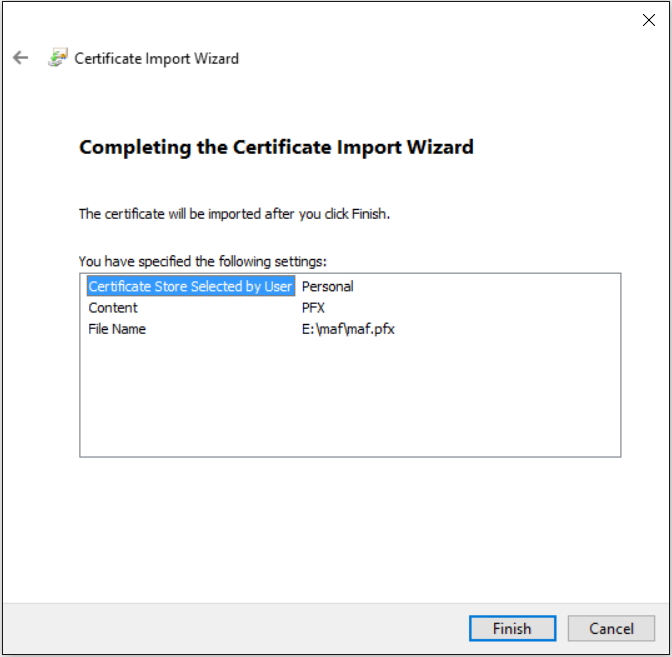
Now we have to import the PFX file into the certificate stores by clicking on the PFX file.
We have to run this wizard 3 times.
The first one will be in Current User location.
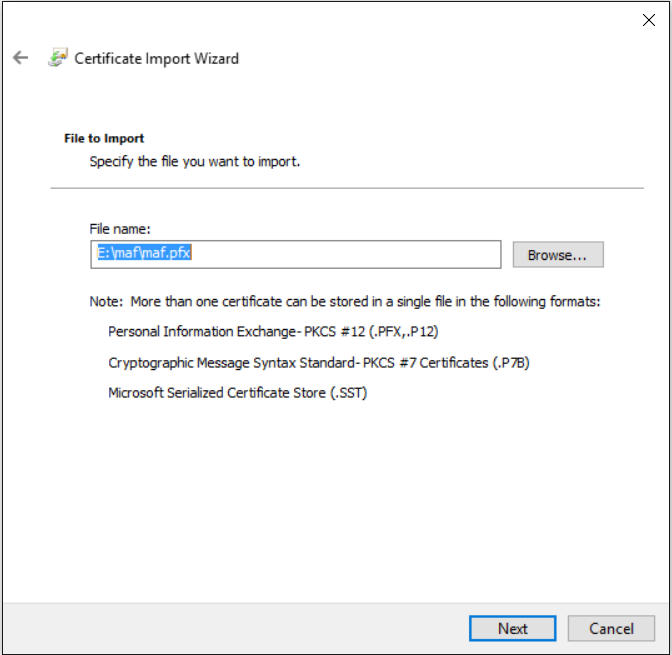
We have to select the pfx file.
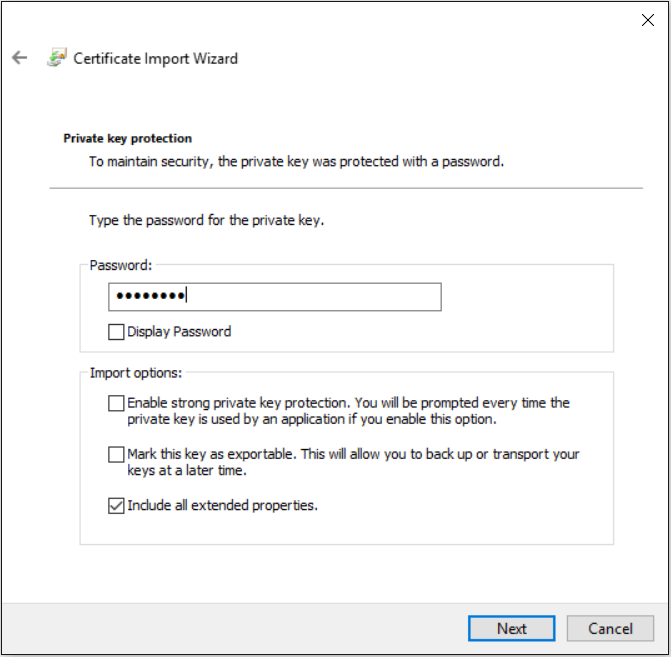
We have to set a password for the password for the pfx file and click next.
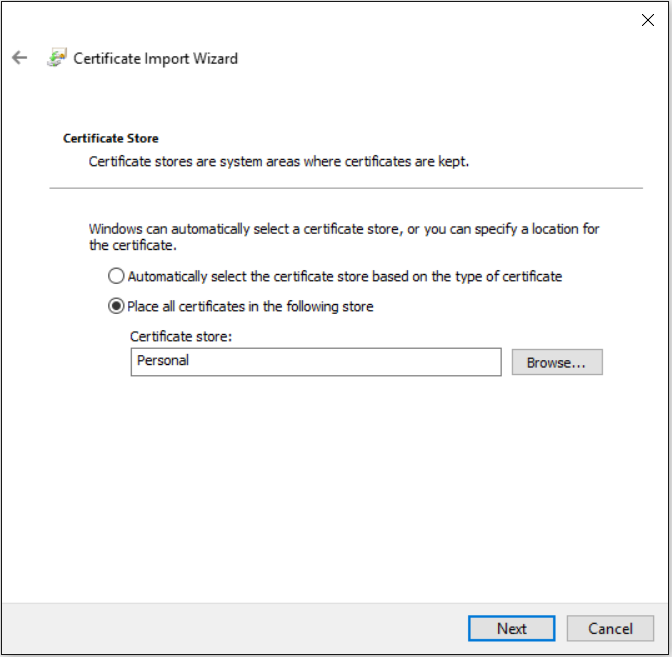
In this first import we have to select Personal certificate store.
Click on finish to import the file.
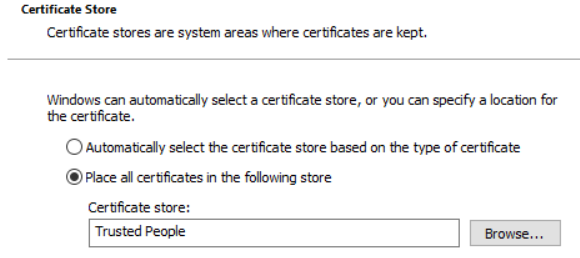
The second time we execute the import wizard we have to use Current User location and Trusted People Certificate Store.
And the third time we have to select Local Machine location and Trusted People Certificate Store.
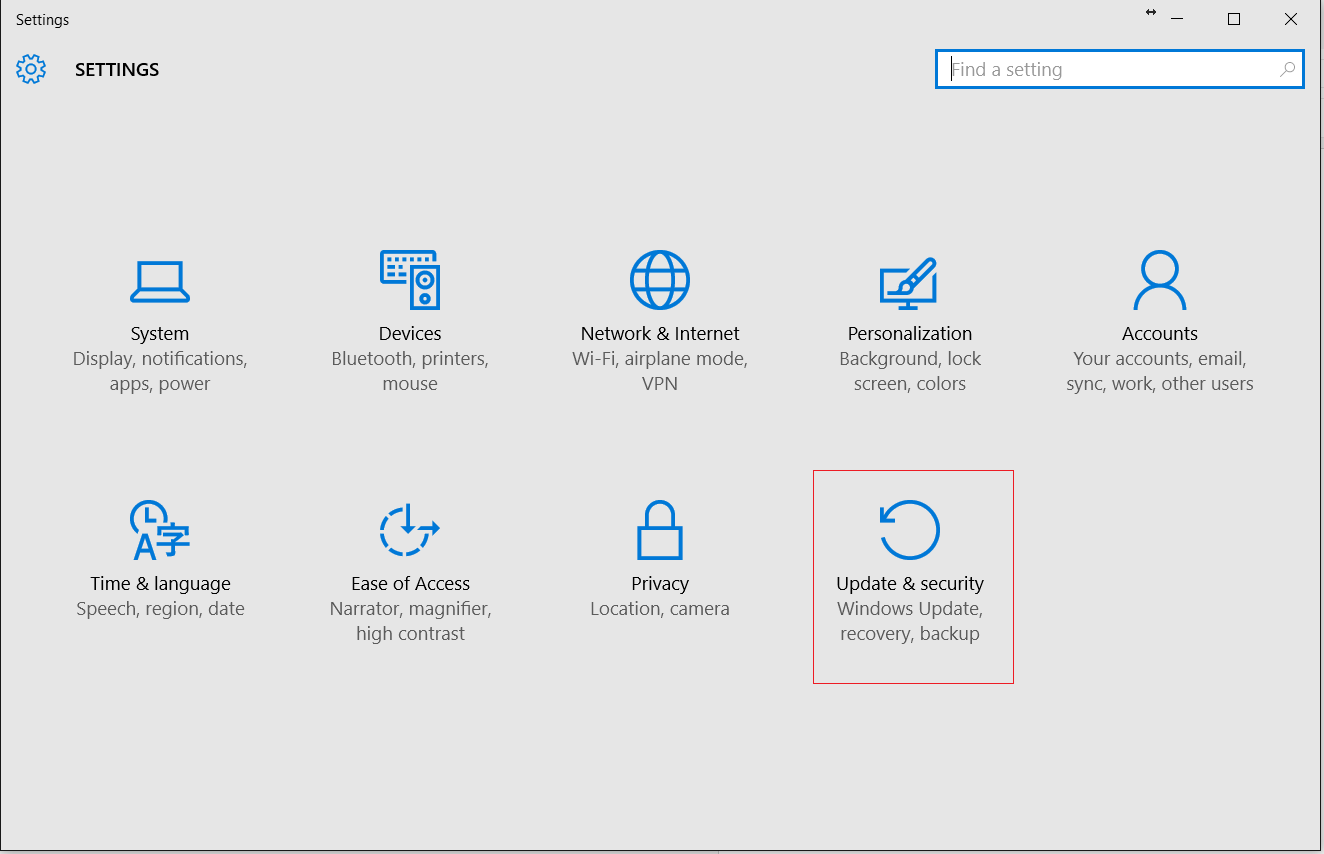
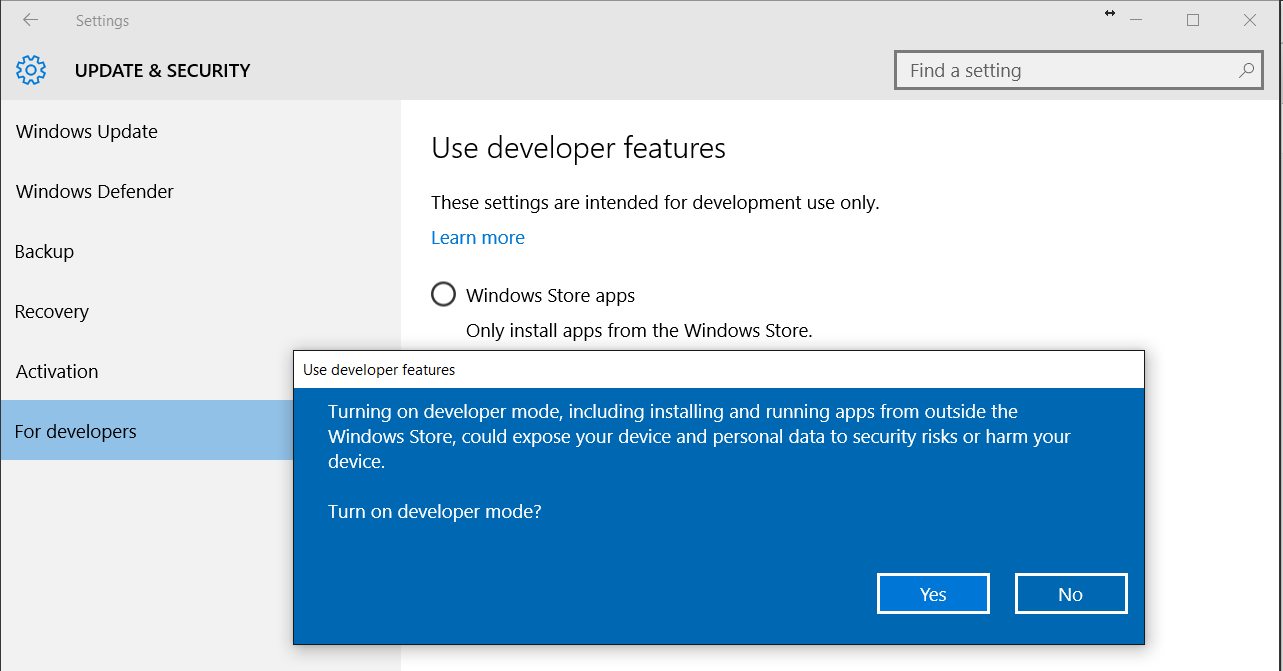
Enabling Developer Mode in Windows 10
We need to enable Developer Mode in Windows 10 as by default we will not be allowed to run applications if are not installed from Windows Store.
We have to open settings and click on Update & Security.
Then click on For Developers and click on Developer Mode.
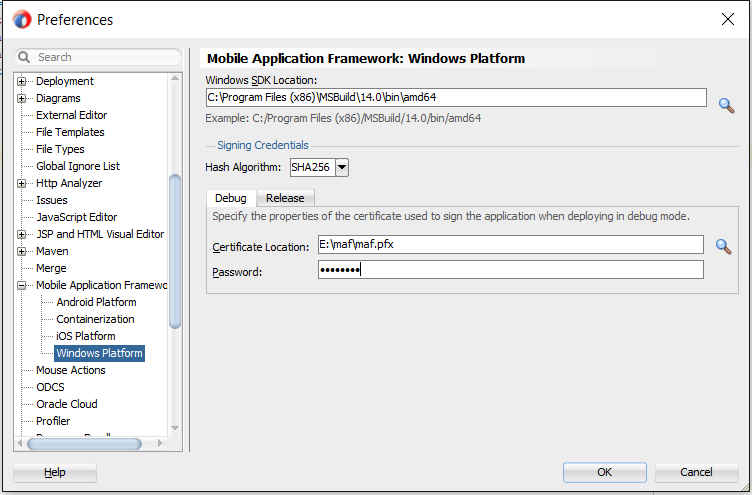
Configuring JDeveloper
The last step is to configure Windows Platform in JDeveloper preferences.
We need to provide Windows SDK location, the PFX file and its password.