Browse Category by SOAP Connector

MCS: Calling SOAP connector bypassing XML/JSON translator

In the MCS project we are working we have to create some SOAP Connectors to integrate with Siebel. A great thing of MCS is that although we are going to consume a SOAP web service, the XML payload is automatically translated into JSON. You can get more info in MCS Documentation.

I would like to thank Oracle Mobile PM  team, specially Grant Ronald and Frédéric Desbiens for their great help and for sharing best practices about this issue.

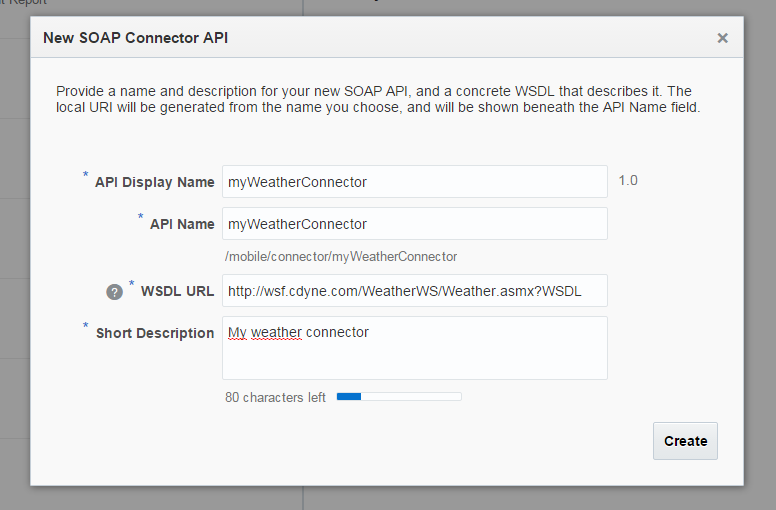
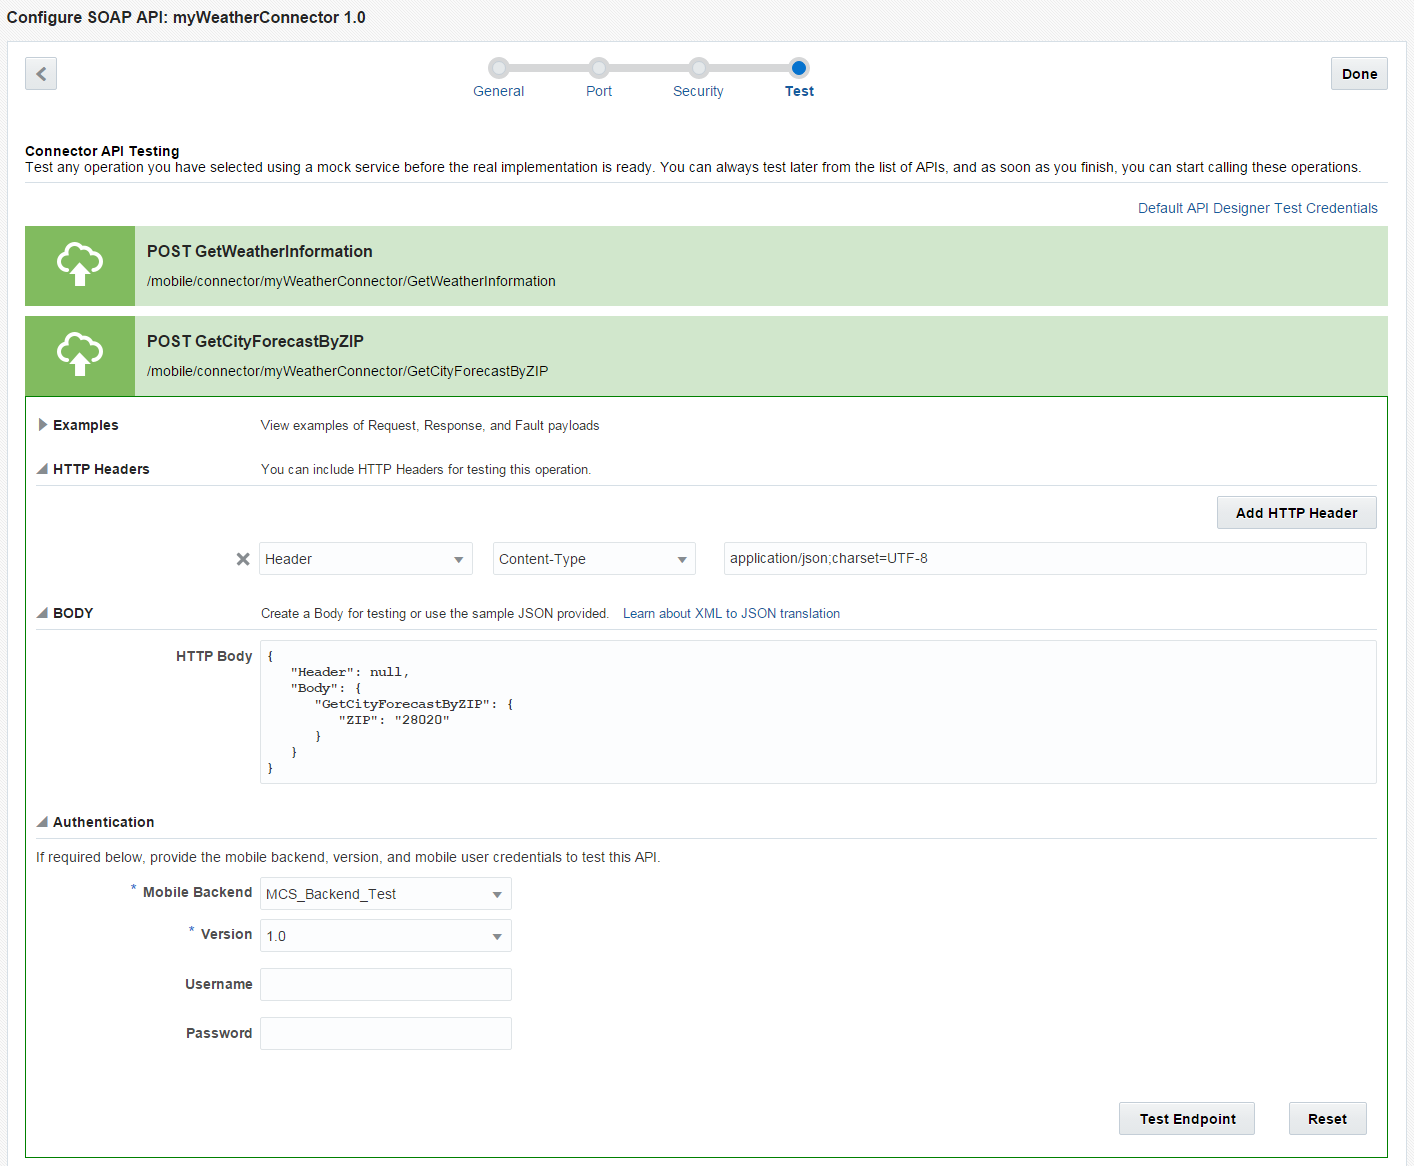
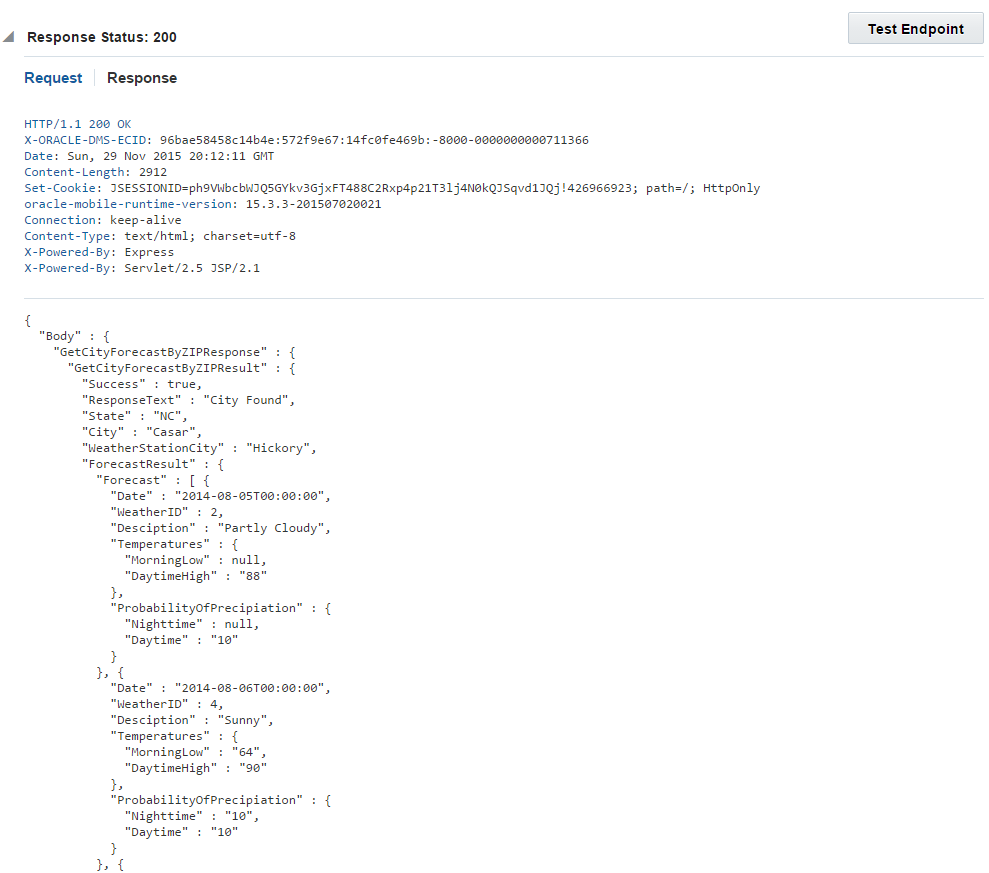
As soon as we create a SOAP Connector and try to test it we can see that the body we have to provide is a JSON.

But there are some cases where the translator is not perfect. We had a problem with some services that had an XML structure like this:

The translator seems not to add the  namespaces in the header therefore Siebel cannot parse the request.

The solution is to send a XML instead of a JSON, bypassing the translator.
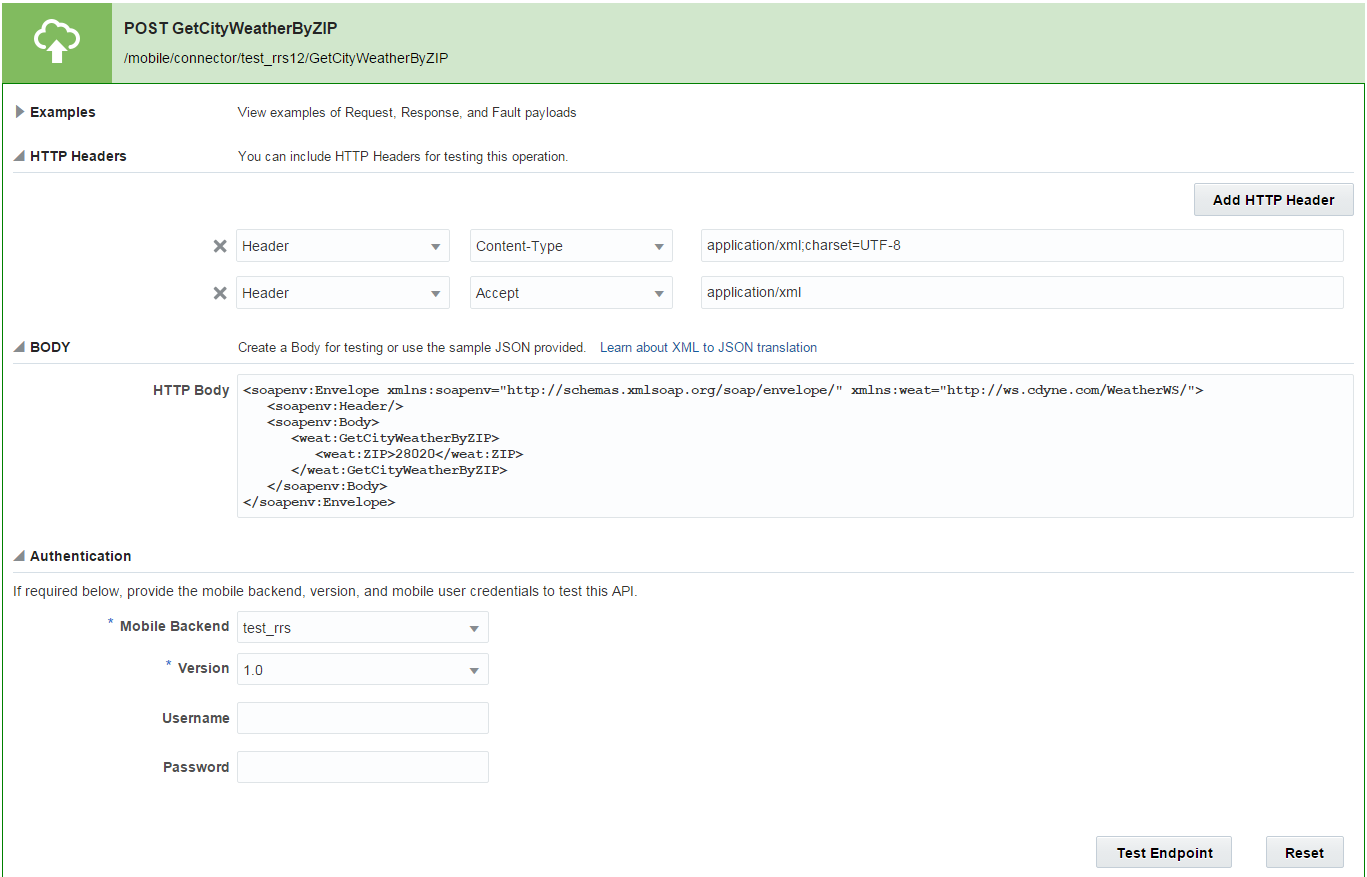
We can test this in SOAP Connector tester. As we need the required XML, we can get it in any web service client tool like for example SoapUI.

We also have to set “Content-Type: application/xml;charset:UTF-8” and “Accept: application/xml” as header parameters.

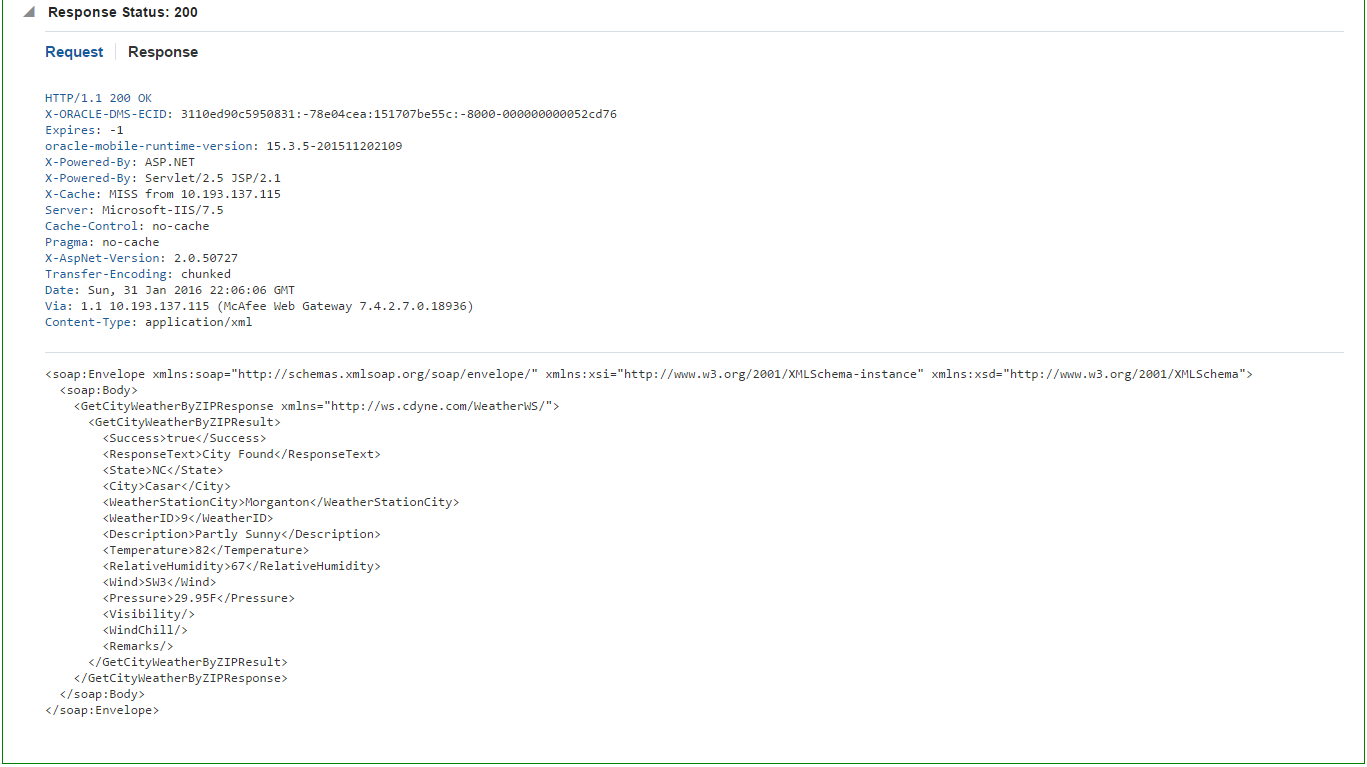
If we test the Connector we can see that the web service call is working.

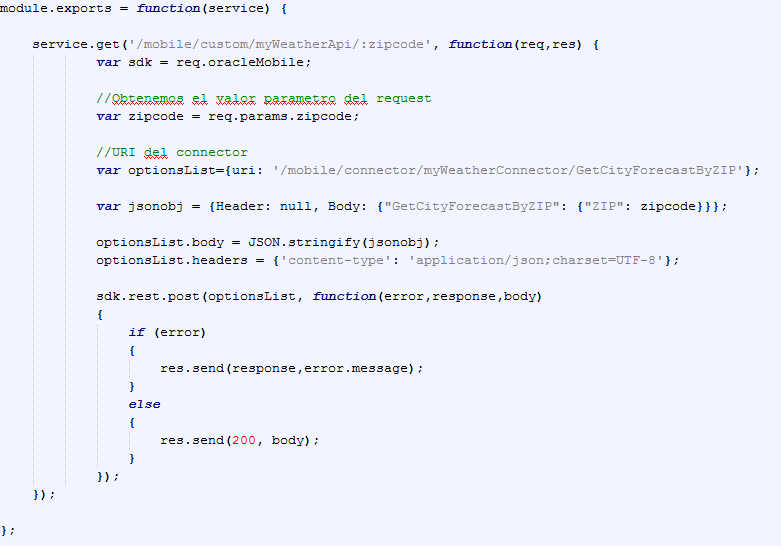
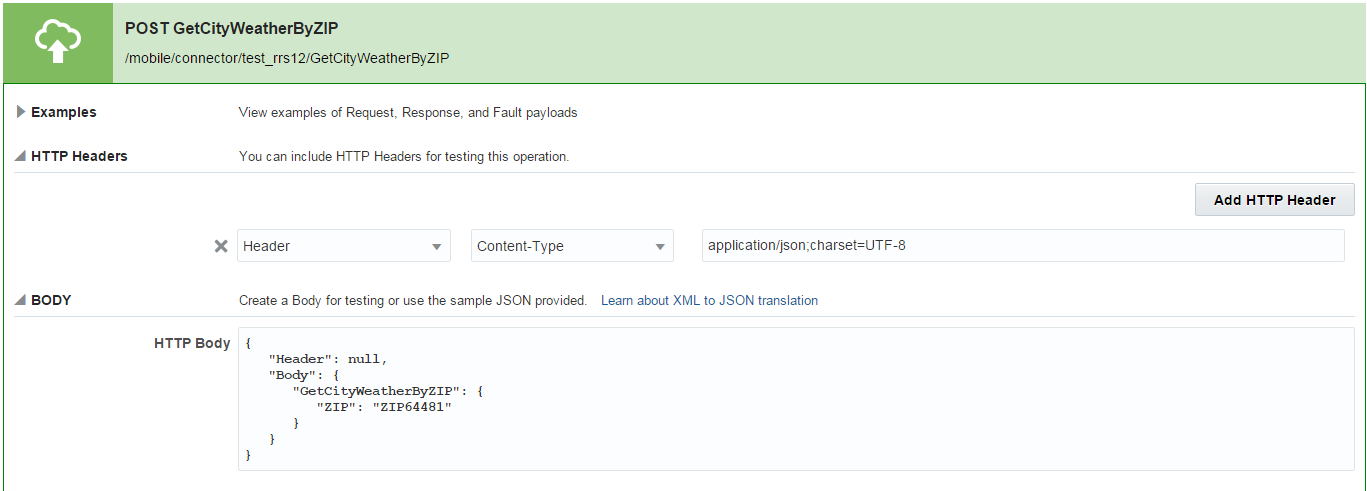
How do we implement the Custom API to send a XML payload to the connector?
The answer is to set the XML we want to send as the body of the request and set the header parameters we previously use to test the connector.

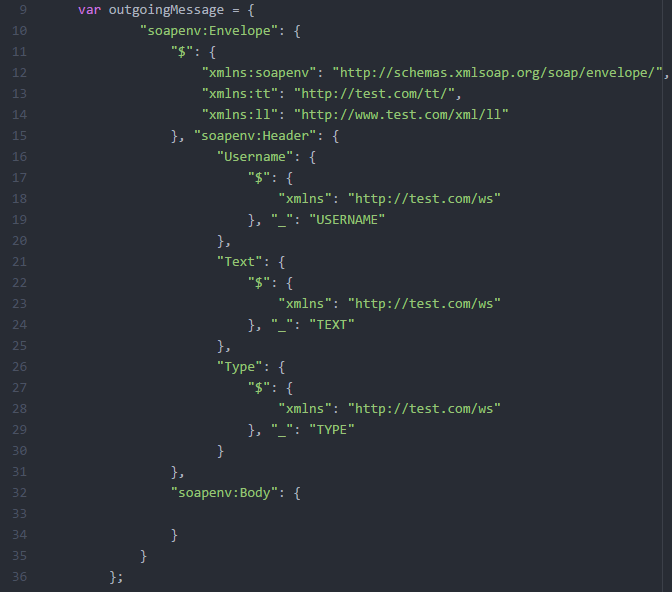
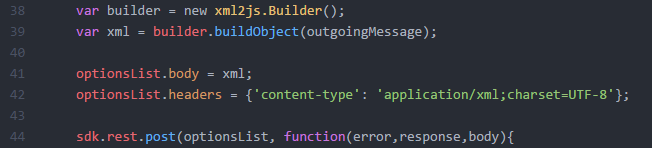
But, is this the recommended approach? Yes it is, but instead of sending a String with the SOAP message it is more secure to send it as a JavaScript object.

In order to implement this we have to follow some steps:

  1. Download and Install Node.js. link
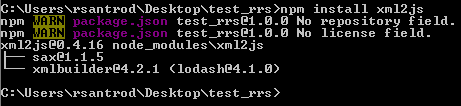
  2. Install xml2js module.
  3. In this example test_rrs is the directory where the package.json file resides.

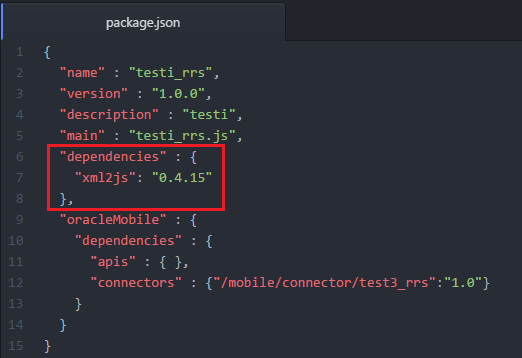
  4. Add xml2js as a dependency in package.json
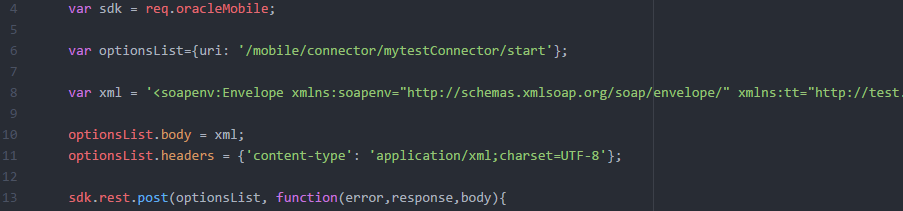
  5. Moving to our javascript file, as I already stated before the first idea was to build the SOAP message as a string. This first image is the base implementation and we are going to make some changes to it.
  6. First we need to add var xml2js = require(‘xml2js’); at the top of our implementation.

    This is the tricky part, we need to create a JSON like this.
    ‘ $ ‘ means that we want to add attributes to the XML element.
    ‘ _ ‘ means that we want to have something inside that element.

    The last thing we have to do is to create a xml2js.Builder object and execute buildObject method using the json object we have just create. The result of this method is the body we are going to send.
After the implementation is done we just have to put everything inside the zip file and upload it to MCS.
If you want to know more about xml2js click here.

MCS: Custom API that calls a SOAP Web Service

In one of the other posts about MCS i showed how easy we can create an API that makes a call to an external REST web service. MCS Connectors also allows to connect to a SOAP web service. Although there is a couple of different things I am going to start the process from the beginning.

  • Creating the connector

We have to head to Connectors page, click on New Connector button and pick SOAP sub menu.
In the popup we need to fill some information including the SOAP web service URL.
We are going to use a public weather service:
http://wsf.cdyne.com/WeatherWS/Weather.asmx?WSDL 

Our connector has been created. Now we can configure settings like connection timeout or add security policies.

In this example we are not going to add any extra setting so we can continue to the last step, Test.
As you can see although this is a SOAP web service, the tester let us introduce a JSON payload.
This is one of the great things of MCS, the SOAP Connector uses a JSON translator and transforms automatically the JSON that we are going to use to the xml that the SOAP web service needs.

Now if we set a zip code into the JSON and click on Test Endpoint we can see that the web service returns us the weather of that zip code.

  • Create and Implement a Coustom API.

Now that the connector is up and running we need to create a Custom API that will make the call to the connector.
We have to navigate to APIs page and click on New API.

In the popup we have to fill the name of the API and a short description or upload a RAML file.

Now there is a setting we have to change in order to avoid authentication and having to create users. Head to Security option and be sure to select On  in Allow Anonymous User Access.

We need to create an Endpoint we click on New Resource and add {zipcode}. This is the parameter that our API will need to send it to the connector call.

After that, clicking on methods (in the right hand side) we will add a GET method.

Now that we have designed the API, we need to implement it by downloading the JavaScript Scaffold.

In the zip file there are 4 files.

package.json is the file where we can set the dependencies of our API, in this case we have to add our connector’s URI.

In myweatherapi.js file we have to make the implementation.
There is a couple of things that differs from the REST connector call.
  1. In the URI of the connector we also have to add the name of the method that we are going to call, in this case GetCityForecastByZIP.
  2. We need to build the JSON that we will send to the connector.
To achieve the second point we can use the example payload from the connector tester and put zipcode parameter.
After building the JSON we have to make a post call to the connector.

Once we have finished the implementation we have to pack the files in the same zip filethat we have downloaded and upload it to MCS.
The last step is to test out API. Just type a zip code, select the MBE and version and click on Test Endpoint. You will see that the API works and returns us the weather forecast.