Browse Category by ADF 12c
View Post

ADF: af:table filter modifications using a custom Query Listener

In one of our last projects we had the requirement to allow the user to filter tables using the table filter feature. By default you can filter String fields starting with the word that the user provides, but our customer needed to find the rows that contained the criteria.

This is an easy task that can be accomplished by creating a custom Query Listener method.

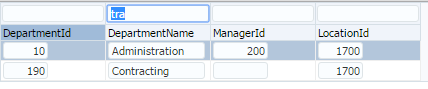
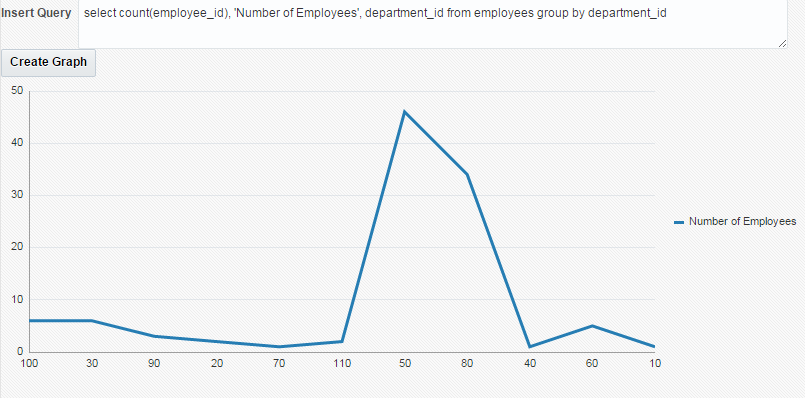
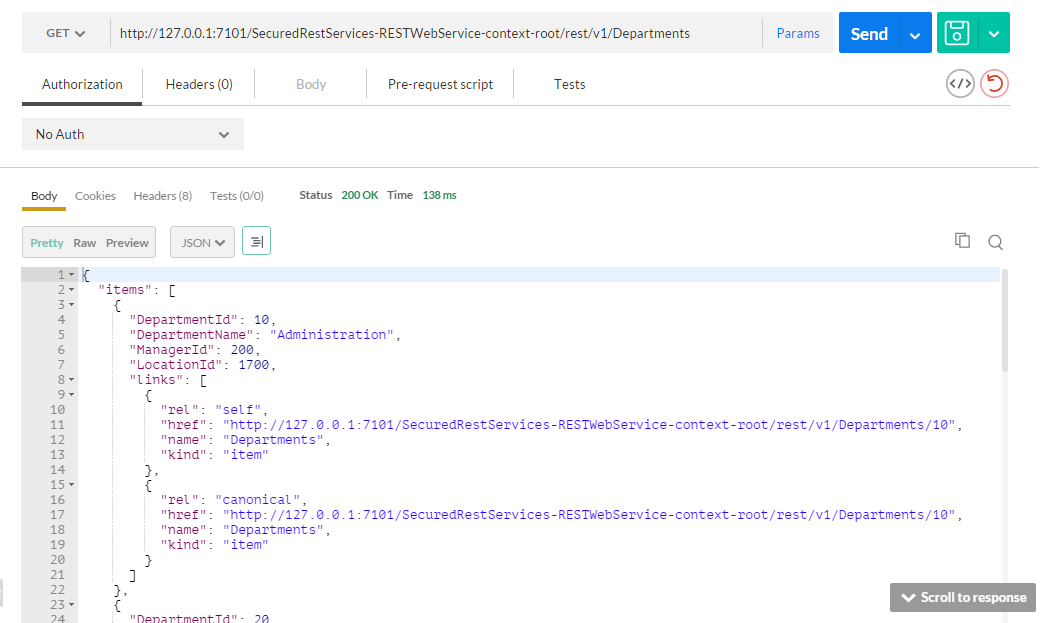
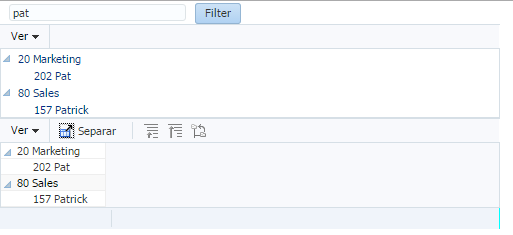
As by default the filter works with “Starts with” condition you will see that filtering by “tra” will give no result although departments like Administration exists.
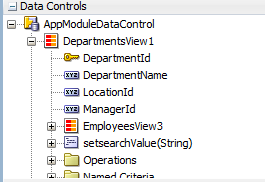
In this example we will use Departments table in HR schema.

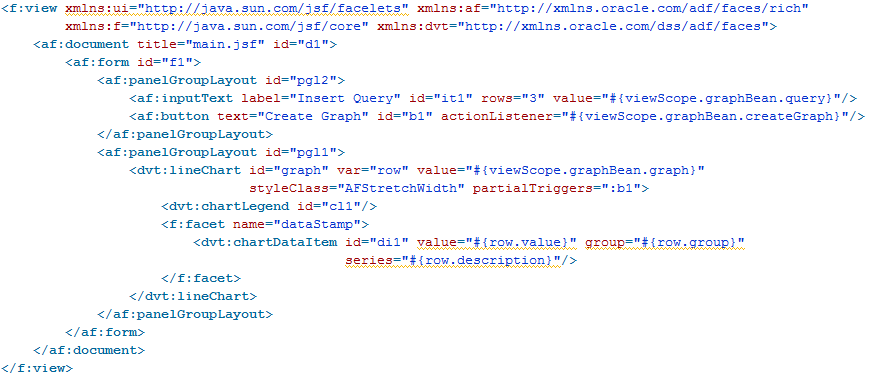
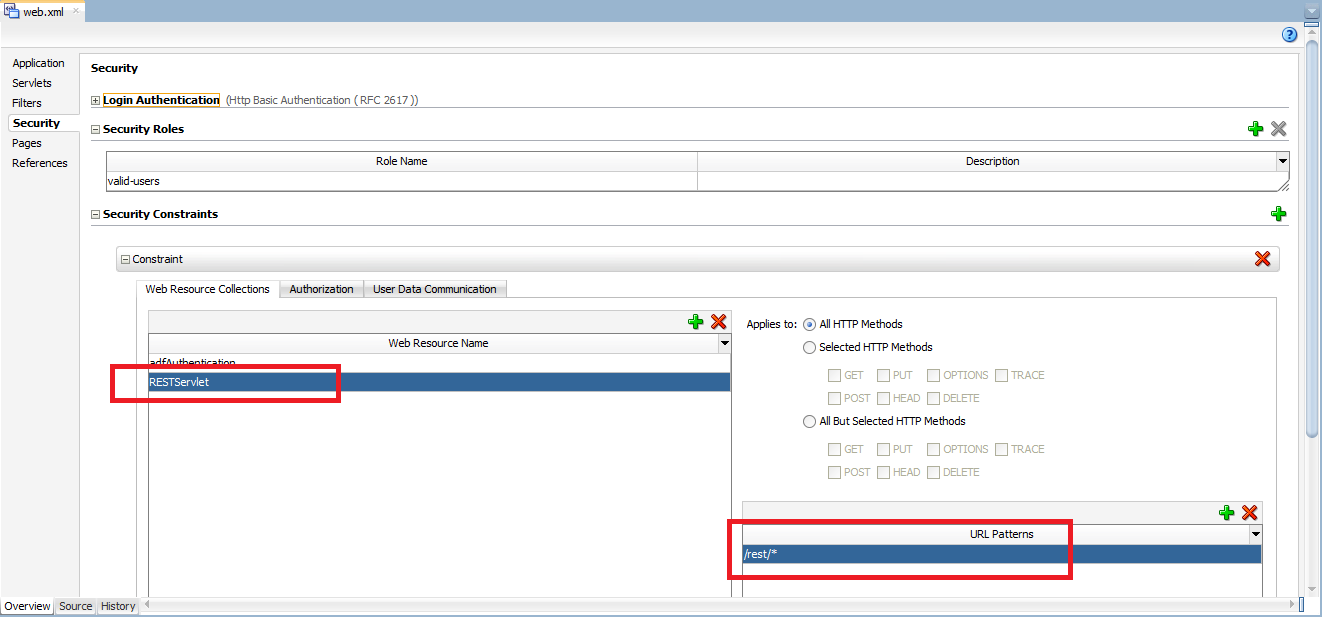
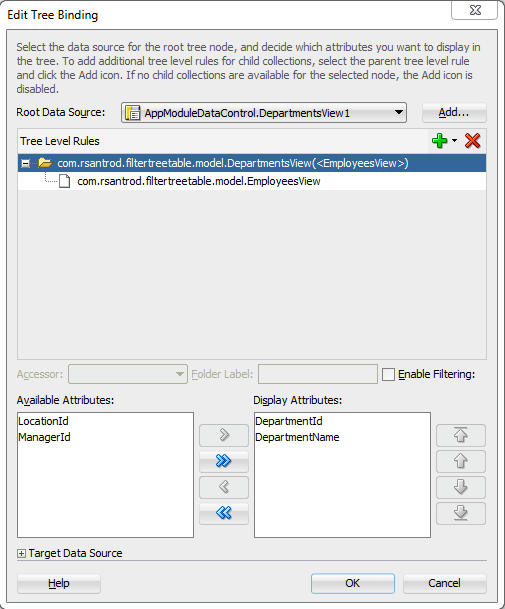
When we drag and drop to create a table and we set it to be filterable, we can see that a query listener has been created by default.

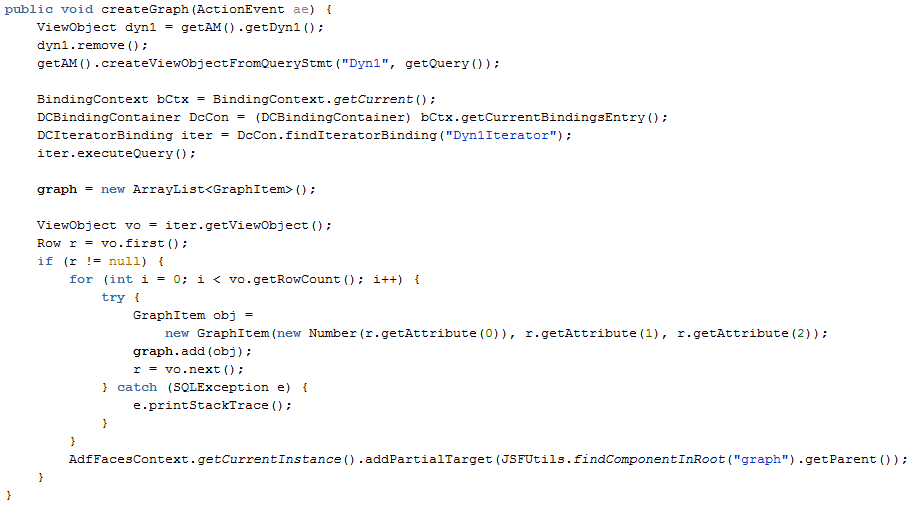
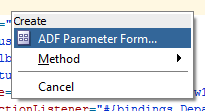
As we need to modify the filter values we need to create ouor own query listener.
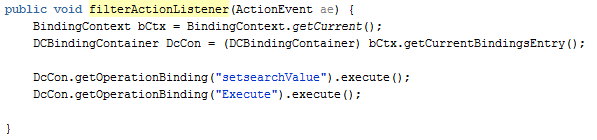
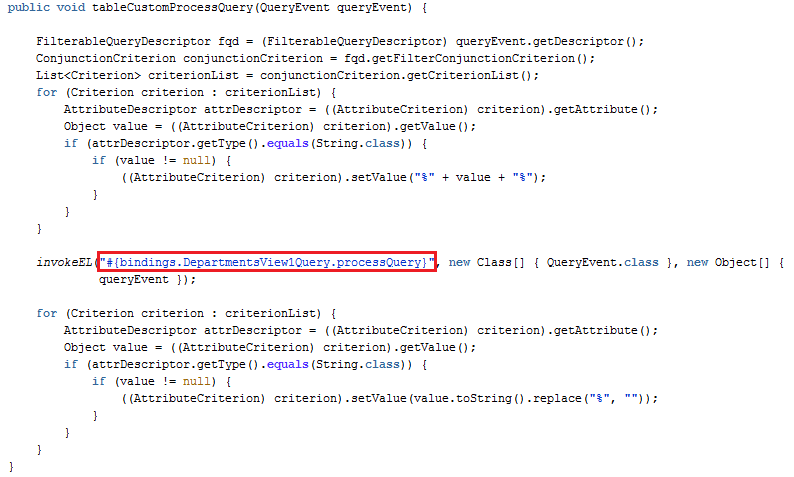
The idea of this method is to get every value, and if it is String we have to change the original value and concatenate ‘%’ before and after the value.
After that we need to call the default query listener that we can get from queryListener property in the table component.
If we end here, the  user would see the new filter with % symbol, so we are going to remove it and leave it as the user type it.

This is the helper method we use to call the default  query listener.

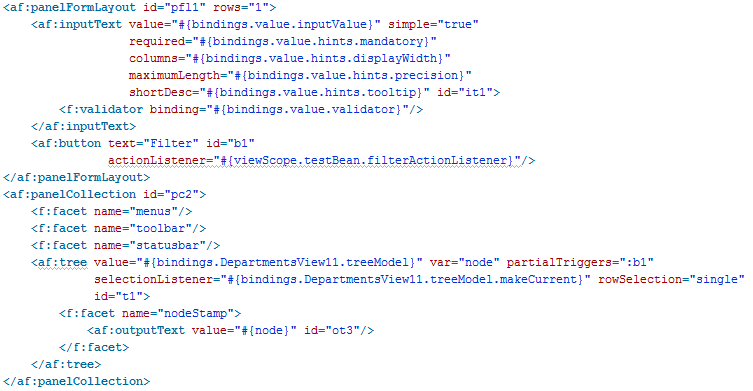
The last step is to set our new method as the table’s query listener.

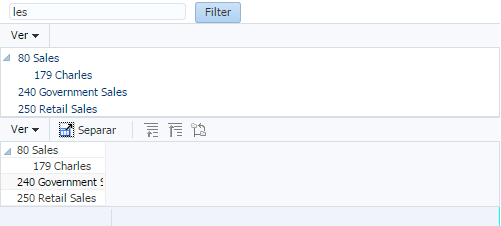
If we run the application we can see that if we filter by “tra”, we can now see some records.

View Post

ADF: DVT Charts based on a dynamic vo

In one of our latest projects we had the requirement to create a reporting feature that based on some filters we had to built a custom query and display those results in a chart.
In this post I will show you the approach we followed.

The first step is to create a dummy view object. We are going to use SELECT * FROM DUAL as its  query.

After this we need to add this view object to our Application Module data model and also create AM implementation class.

The main thing we are going to make is to create a List in our bean, based on a POJO that we will populate with our viewobject data.
We are going to add 3 attributes to our java class with their getter and setter methods.

After that, in our page’s bean we need to create a couple of properties. The first one is the List that will hold the values, and that will be the value property of the graph, and the second one is a String that will be the value property of the input where we will introduce the query.

The next method of the bean is the one to create the graph.
The first three lines let us create the viewobject a runtime passing the query and the view object instance.

In the rest lines of our method we are just iterating the view iterator and populating the graph List object.

The last step is to create the page that will looks like this

In the page definition file associated to the page we have to create the iterator binding that we are using in the bean.

While testing if we use this query, we will see a graph with the data.

And if we change it, the graph will change with the new query’s data.

ADF: Different ways to display validation messages

This post is about the different ways that we have to display validation messages when, for example, an input component is marked as required or when other component such as af:validateDoubleRange is used to handle the validation.

We can have a simple form like this:

By default, if there is only one validation error, the validation message will be displayed like this:

But if we have more than one validation error, the messages will be displayed in a popup.

If we want to change the way those messages are displayed we can use a couple of components.
  • af:messages

 We have a couple of properties to configure.

    • globalOnly: When set to true, validation messages will not be displayed within this af:messages component.
    • inline: Whether the messages will be displayed in a popup or inline wherever this component is placed

We can add this component, for example, in the top of the form and whenever we get a validation error al messages will be displayed in that area.

  • af:message

 The second option is to add as many af:message as components we have so we can display validation errors inline next to the component that produces the error.

It doesn’t matter if we have 1 or more errors, all messages will be displayed inline, next to the component.

ADF 12.2.1: Publish and secure ADF Business Components as REST services

In ADF 12.2.1, released just before OOW, many new features were introduced, and one of them is to expose ADF Business Components as REST Web Services. You can check other ADF 12.2.1 features in my ADF 12.2.1 release post.
In this post I am going to publish and secure ADF BC as REST services.

The first thing we have to do is to configure a release version for REST. You can do this in adf.config.xml file.

In previous versions we could expose BC as SOAP web services in Application Module Web Services tab, and now we can choose also REST.
We can select the view instances and set a resource name.

A xml file will be automatically created where for example we can set the attributes we want to expose and also if we want to expose any custom methods that we have created in the view implementation classes.

A new project will be also created in our application RESTWebService. This is the project we have to deploy. Simply click on the project and click on run.

If we test the service with any client tool, for example, Postman, we can see that the service returns Departments data.

The next thing we are going to do is to secure the services. We have to configure ADF Security.

In the configuration wizard RESTWebService project must be selected.

After finishing the wizard we have to secure the resource by adding some roles or users.

The last step is to configure the rest URL pattern in web.xml file, under security tab.

Now we are ready to test. If we don’t set any authorization in the rest call we can see that a “401 – Unauthorized” is returned.

But if we configure HTTP basic authentication, Departments data is returned.

ADF: Filtering parent and child nodes in af:tree / af:treeTable

One of our customers required to filter data in a page with a tree component. Using Ashish’s post I am going to show you how to filter both parent and child nodes having just a single filter value. This can also be applied to treeTable component.

The first thing we need is a tree component and data structure, in this case we are going to use Oracle’s hr schema tables: Departments and Employees.

In our page we drag and drop DepartmentsView from datacontrols palette and create a tree component.

The next thing we have to do is to create a View Criteria in Departments View Object (parent).

We also have to crete a View Criteria in Employees View Object (child).

We have to expose setter method of the bind variable in parent View Object.
As we exposed the bind variable in parent, we need  to pass that value to the child by overriding createViewLinkAccessorRS method in parent View Object Implementation class (DepartmentsViewImpl.java)

The last step in the Model is to set a default View Criteria in parent View Object. To set it we have to right click on the View Object instance in our AppModule, click on ‘Edit’, select the View Criteria and click on ‘Ok’ button.

The Model is now finished, we now have to drag and drop the setter method from the data controls palette and create an ‘ADF Parameter Form’ so we can provide the filter value.

This will create ‘setsearchValue’ method binding in the pageDef. We also need to create a Execute operation of the parent View Object and call both operations from the ‘Filter’ button ActionListener.

This is how we should have the page.

If we run the application we can see the if we filter by ‘pat’ we just get values that contains that string.

If now we filter by ‘les’, we can see that we get values with ‘les’ string in both parent and child nodes.