Browse Year by 2016
View Post

ADF: Responsive UIs using af:matchMediaBehavior

This is not a new component as it was released with version 12.2.1 back in November but it deserves a mention as it allows us to easily create responsive user interfaces. Although we were able to define media queries in our css and skin files, this component allows us to change component properties according to the screen size.

This component has 3 properties to look at:

  • propertyName: Name of the property we want to change
  • matchedPropertyValue: New value of the property
  • mediaQuery: Here we can set the condition by defining a CSS media query. You can learn more about it here: CSS Media Queries
In this example I am going to use a simple form based on Employees view object from HR Schema.
We are going to change the number of rows of the panelFormLayout to 7 when the screen with is less than 900px and we will change it to 15 if the with is less than 750px.
As you can see by default the form is displayed like this:
If we make the screen smaller we can see that the layout is changing (you can see the with of the screen at the top right corner of the images)

View Post

ADF: using popupFetchListener to execute a method before the popup opens

When developing ADF applications, a common way to create or update a record is doing it in a popup. There are many ways to do it that I have seen in some of my last ADF projects, for example:

  • Executing createInsert operation in the button’s action listener and then opening the popup programmatically 
  • Using an action listener to create the record and using showPopupBehavior with triggerType set to click (In this case, if the button is disabled on some condition, the actionListener will be executed anyway)

In this post I am going to show you another way, using popupFetchListener.

In this example we are going to drag and drop Departments view object as a table (we don’t really need it but we can see the new created record), and 2 buttons, one for creating records and other for editing them.

In each button we are going to add a showPopupBehavior component  with triggerType property set to action and popupId proerty set to the id of our popup.


Once we have the buttons, we create a popup and drag and drop departments view object as a form.
After that we have to create a popupFetchListener in the properties panel.

 This will create a method in our bean where we have to check the button we have clicked in order the call CreateInsert opeartion only when we click on Create button.

This is how the page definition file looks like. The tree binding, 4 fields of the form and the create insert operation that we call in the popupFetchListener.

The result of this implementation.

You can find the code of this post in Github.

View Post

ADF: tagCloud component overview

In ADF 12.2.1.1, released a couple of weeks ago, we had many new features as you can see in my previous post ADF 12.2.1.1 has been released: Bug fixes and lots of new features.

One of them is the DVT component Tag Cloud (af:tagCloud).

In this example I am going to show a quick overview of the component. I am going to use Jobs and Employees tables of HR schema.

In order to create the component we just have to drag and drop the desired viewobject into our page and select ‘Tag Cloud’.

In the wizard we have to provide at least 2 fields: ‘Text Value’ that will be de displayed value in the tag cloud and ‘Relative Size’ that will determine the size of each item.
We can also create Grouping rules to make each group to have a different color or to highlight the items of the group when we hover them, etc.

If we run the application, by default we will see something like this (rectangular layout).

Cloud layout is also available.
We can also set a selection event in the tag cloud.
We need to set selectionListener, selectedRowKeys and selectionMode properties.
Using the tagCloud in a Master-Detail:

In tagCloudItem we can set an actionListener where, for example, we can show information about the selected value.
View Post

ADF 12.2.1.1 has been released: Bug fixes and lots of new features

Oracle has released a new version 12.2.1.1, not just and ADF version, it is a new release for all Oracle Fusion Middleware products.

Although this could be seen as a minor release, it comes with lots of new features in ADF Business Components, mainly in REST support, and Data Visualization Tools among others, as well as a lot of bug fixes.

There are many new enhancements to Gauge components, we can now set a title, border and also set the indicator wider that the plot area.

There are some new components, the picto chart.

And the tag cloud. This is a component I have been expecting long time ago as we were able to use it as you can check in this link (Marrying the Worlds of ADF and HTML 5) but it was not available out of the box.

In ADF Faces there are two more cool enhancements as we can set an af:table to cache fetched rows so there is no need to re-fetch when the user scrolls back, and af:inputDate opens directly on the client instead of going back to the server.
There are more changes and improvements in ADF BC as REST Services, Groovy support and desktop integration.
You can check the complete list of new features and bug fixed in this link: Oracle JDeveloper and Oracle ADF 12c (12.2.1.1.0): New Features
View Post

Oracle MAX: Building my first application (Part 2): Application development

In the last release of Oracle Mobile Cloud Service, Oracle Mobile Application Accelerator (Oracle MAX) and Location Services were released. In my first technical post about MCS 2.0 I am going to focus on Oracle MAX, the new tool that allows us to create applications without coding, and that will enable business users, and people that doesn’t know about programming, to build applications easily.

This is a 2 part post where you can find:

In the first part of this post we built a Custom API that we will consume from Oracle MAX.

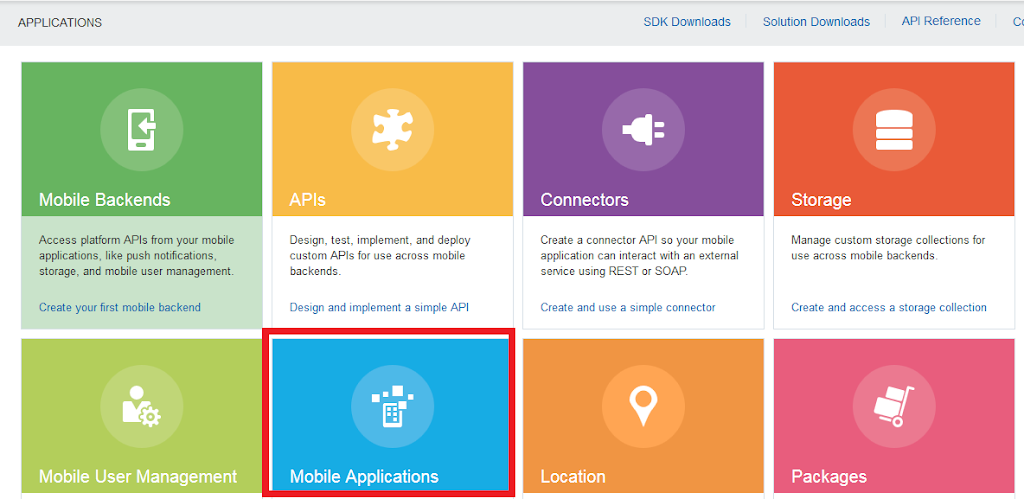
In order to access Oracle MAX, In Oracle MCS applications menu, we have to click on Mobile Applications.

If we want to allow a business user to access Oracle MAX we need to asign them MobileEnvironment_BusinessUser role. Any other user should not have this role as it will not be allowed to access Oracle MCS itself.

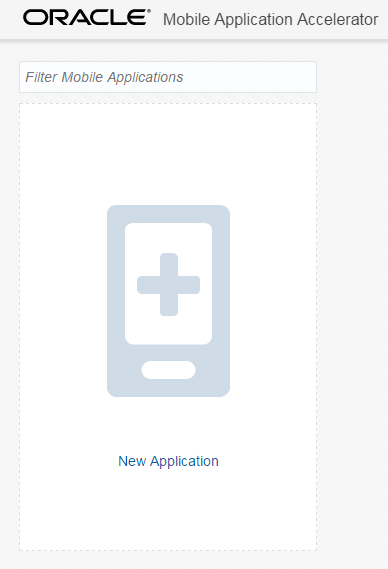
This is what we will see the first time we log into Oracle MAX. As we don’t have any application, we can just create a new one.

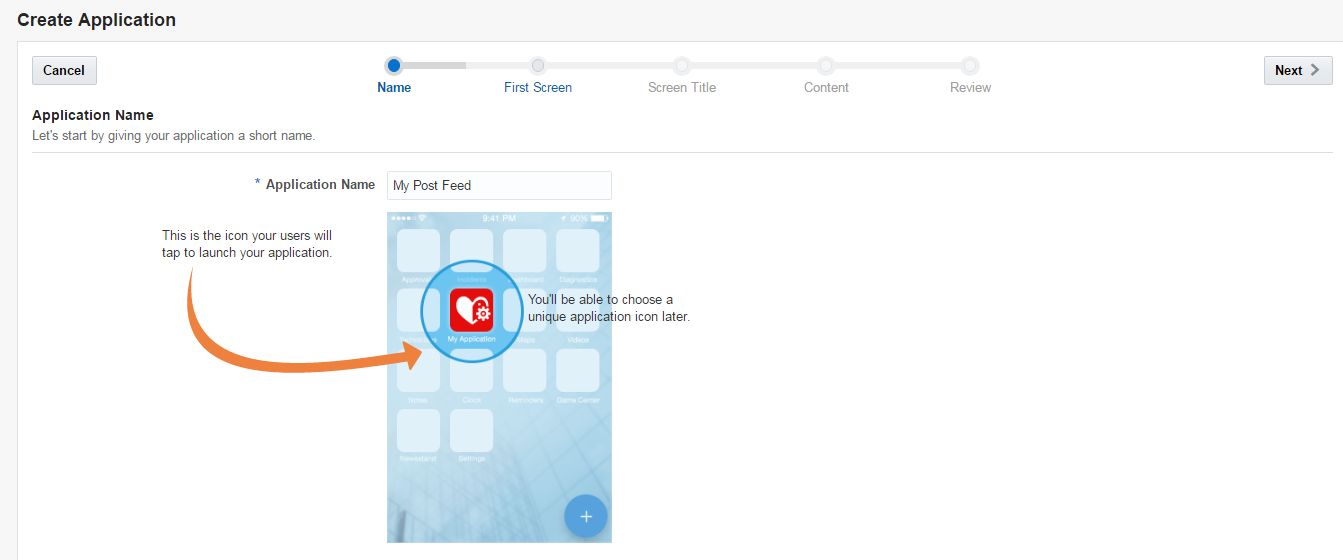
Once we click on New Application, we will see the first wizard. We have to set the name of the application. This is the name that we will see in our device.

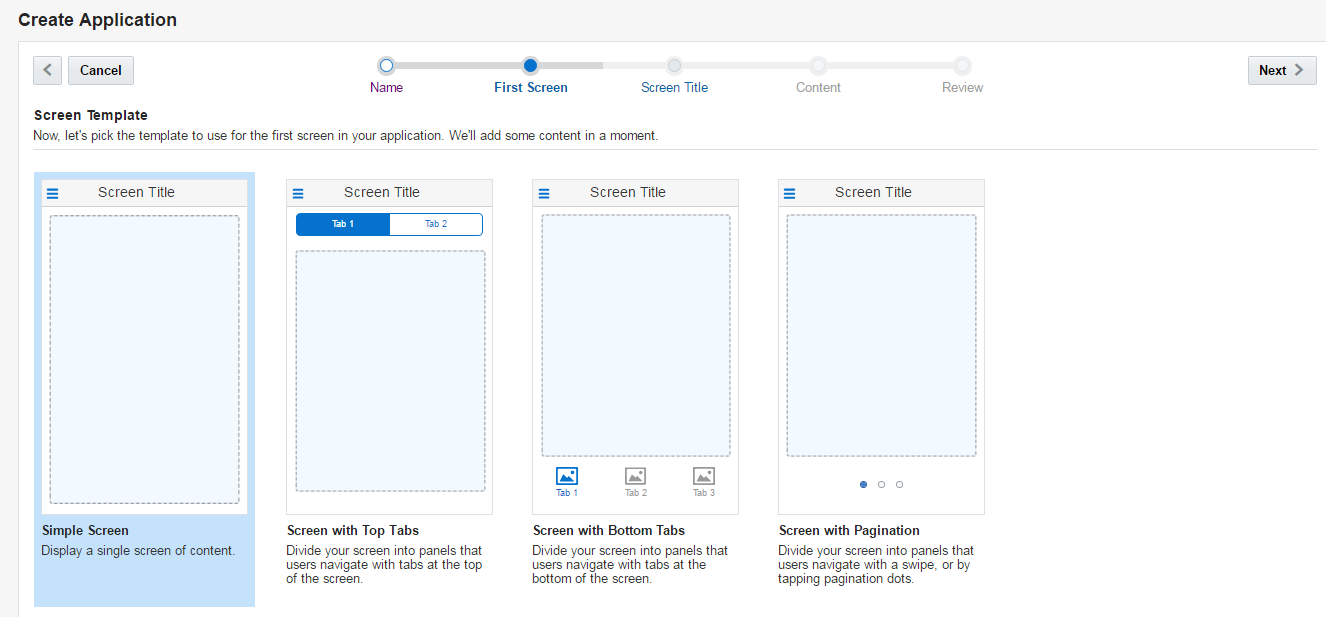
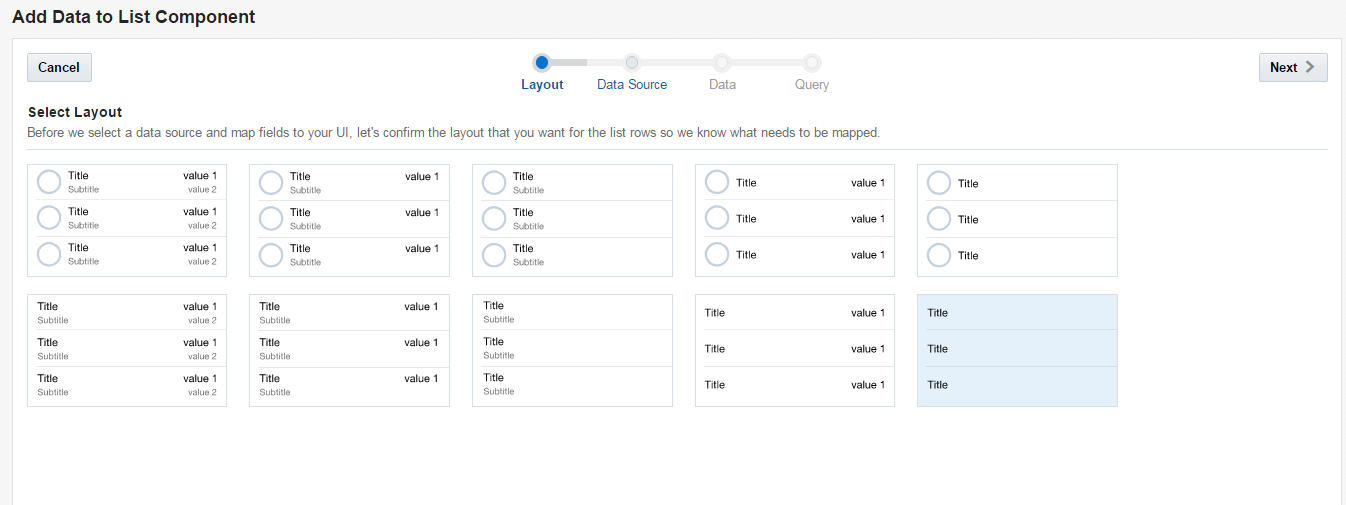
The next step is to define the layout among the predefined ones.

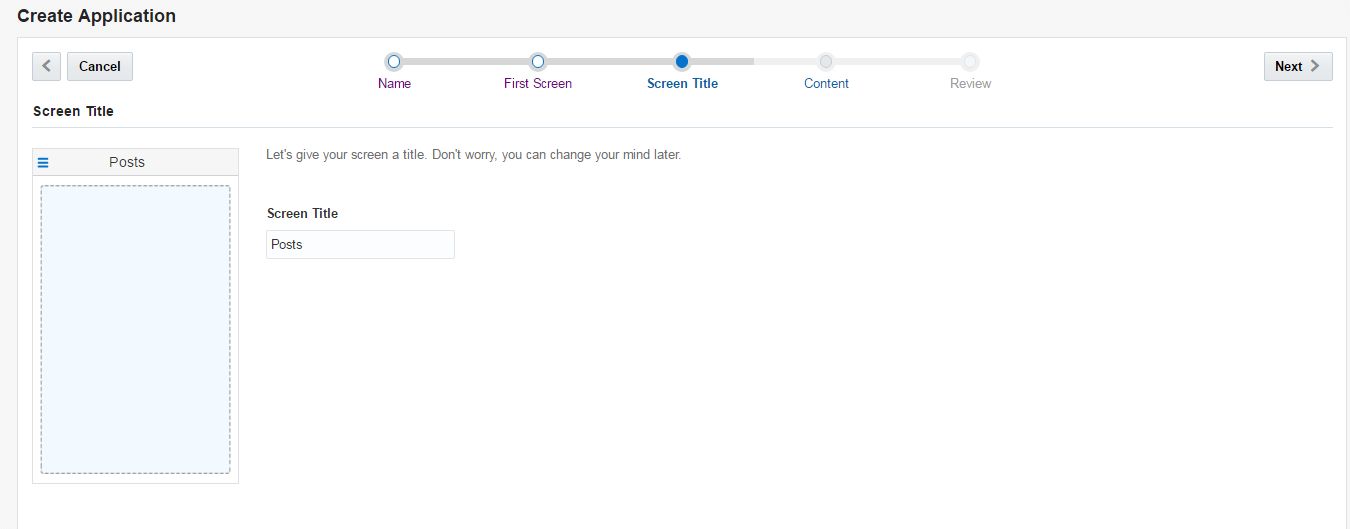
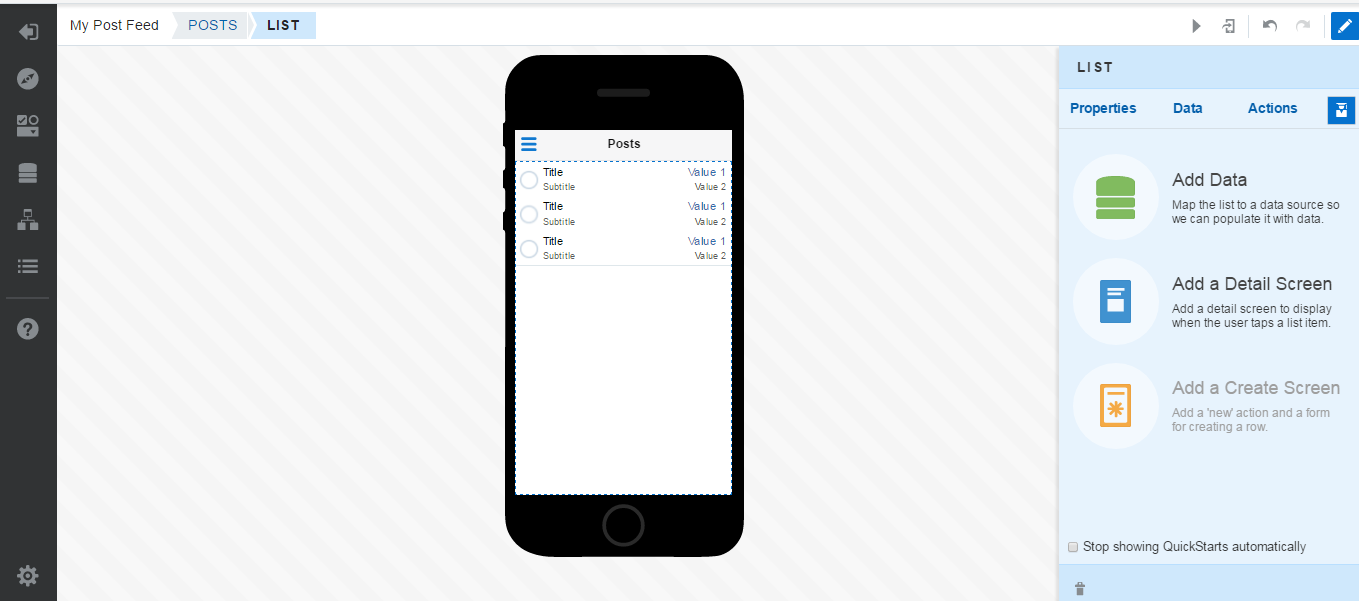
In the next step we are going to set a name to that screen, in this case it will be Posts.

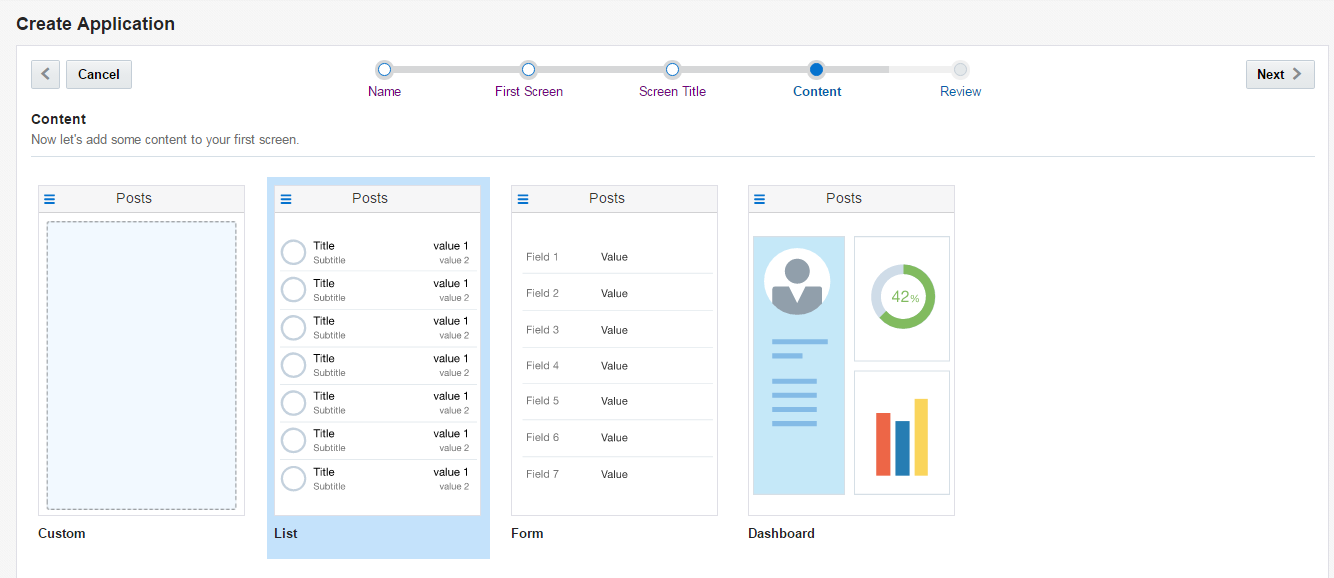
The last step is to define wat we want to see in that screen. we can choose from empty screen (we will be able to add any component), list, form and dashboard.
We are going to pick list in this example.

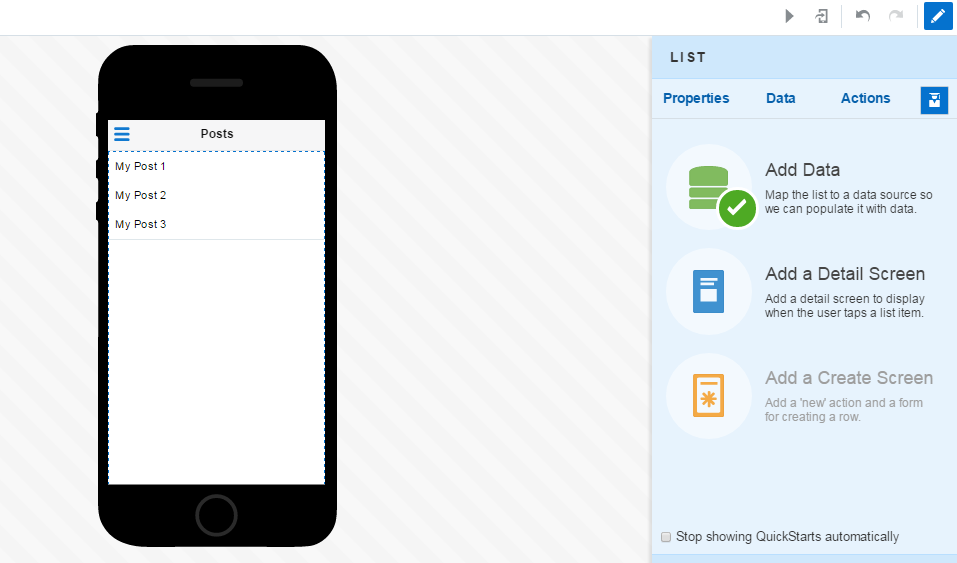
Once we have finished the wizard, we can see that our screen is based on what we selected in the last step of the wizard, and now we can make some actions on it that we can see on the right hand side of the page.

We are going to start with Add Data. This will allow us to associate data to the list component.

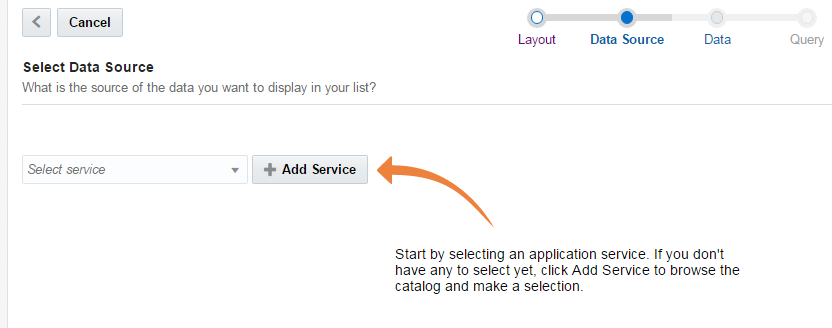
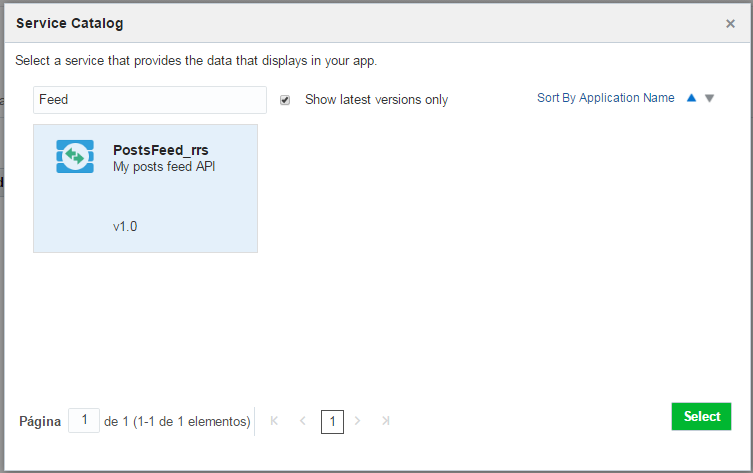
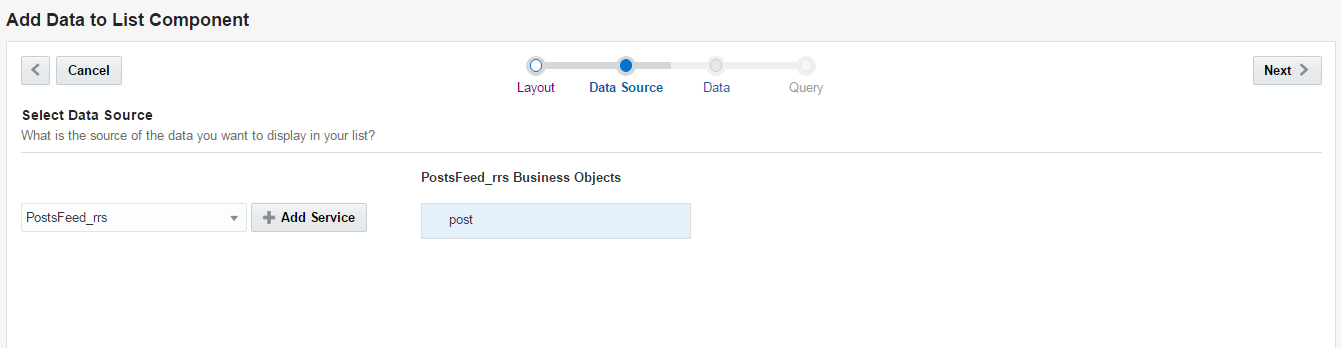
In this step we just have to click on Add Service and look for the API we want to consume.

After we have selected the API, we can choose the business object that we proviously created. This appears as we create getPosts schema.

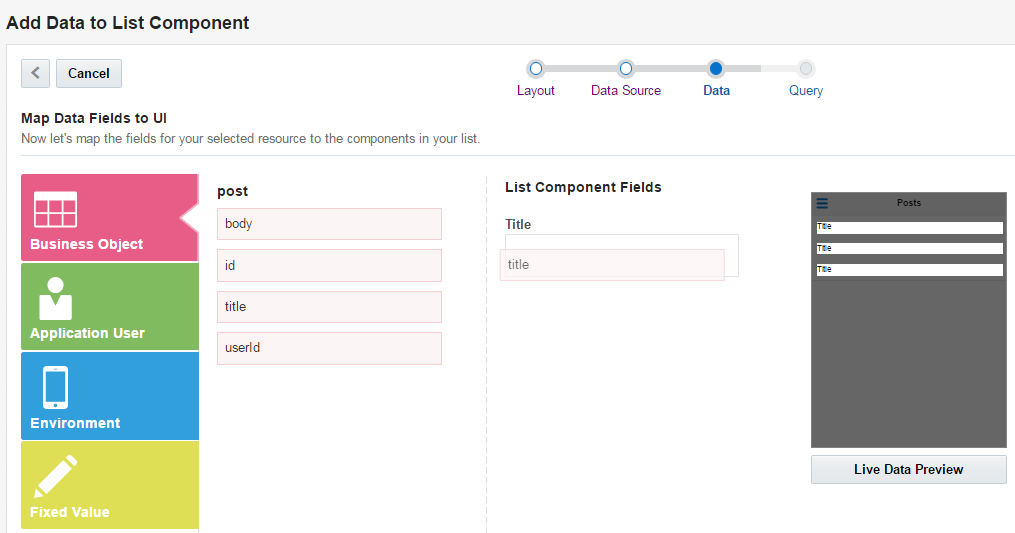
We have to drag and drop the desired fields into the list items. We can see a preview by clicking on the button. 

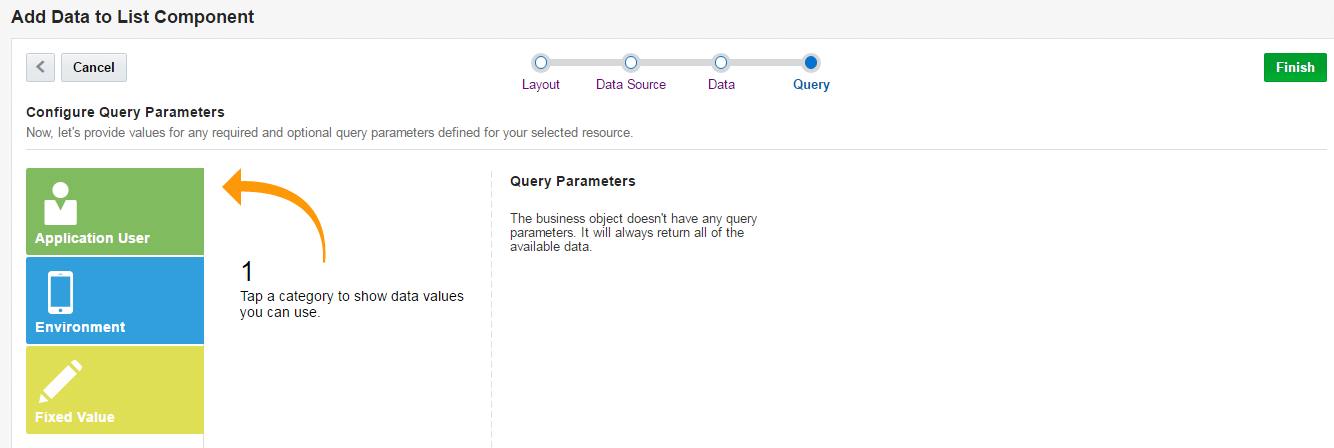
After associating the data to a component, we will see a menu on the left where we can choose user, evironment information, or setting a fixed value to set as query parameter if the endpoint we are consuming has a parameter,

We have just finished our first screen.
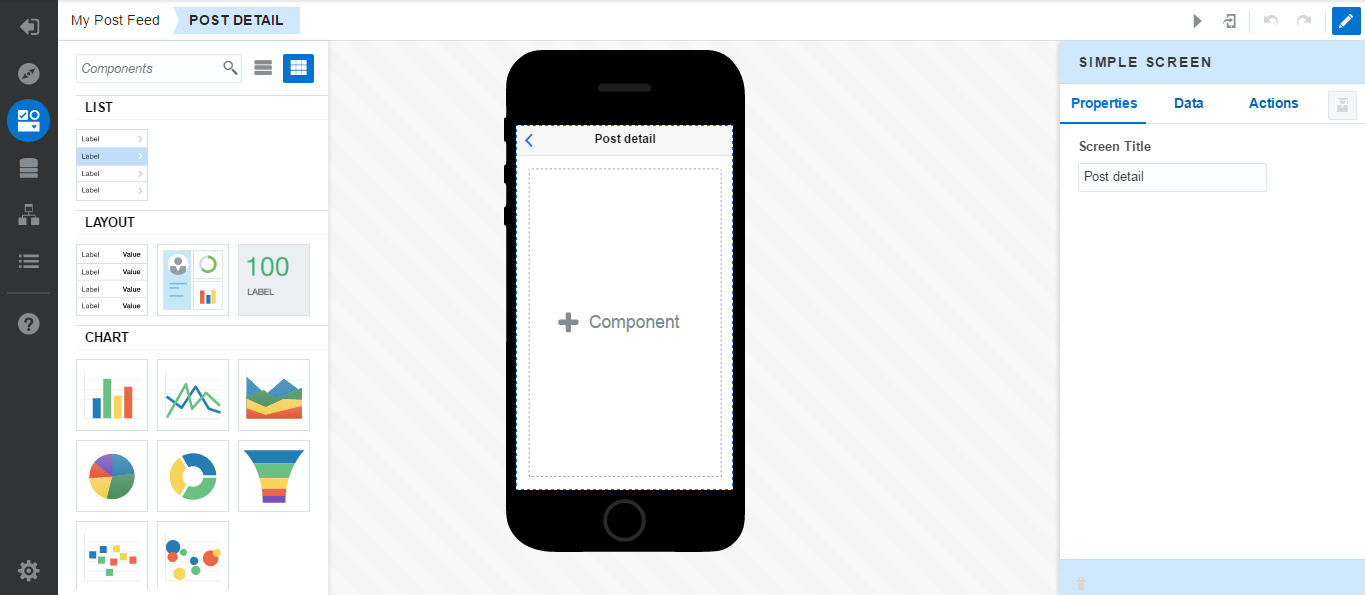
Now we are going to add a detailt screen were we will be able to check the information on a single post.

In we click on Add a Detail Screen  we will see a wizard like the one we filled when creating the first screen.
After that we will see this page, this is the designer page where we can do:
  • Add Components: we can choose lists, forms, charts, etc.
  • Add Actions: we can define actions and add gestures to our page.
  • Modify properties

How we develop the second screen? Well this is easy, just follow the wizards as we did with the first screen.

Once we have finished the application we can deploy it to our device (the second button) or test it right in the browser (the first button).
If you want a user to deploy the applications you need to set that use ‘Max Application Deploy’ role.

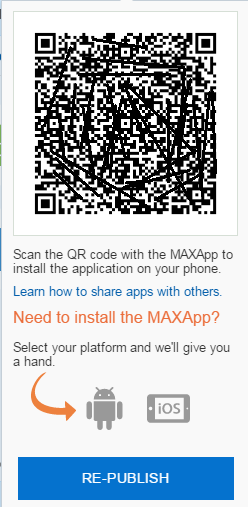
If we click on deploy button, Oracle MAX will start building our application and once it is finished we can see the QR code to download the application.

In order to install the application in our devices we need to have installed Oracle MAX application.
It can be downloaded from Google Play Store or Apple App Store.
This is what Oracle MAX application looks like.
We can click on Edit button to remove the existing aplications or click on add button to add our Oracle MAX applications.
Once we have added our application, scanning the QR code, we will see the posts lists.

And the post detail if we tap in the post.