Browse Month by November 2015

MCS: Custom API that calls a SOAP Web Service

In one of the other posts about MCS i showed how easy we can create an API that makes a call to an external REST web service. MCS Connectors also allows to connect to a SOAP web service. Although there is a couple of different things I am going to start the process from the beginning.

  • Creating the connector

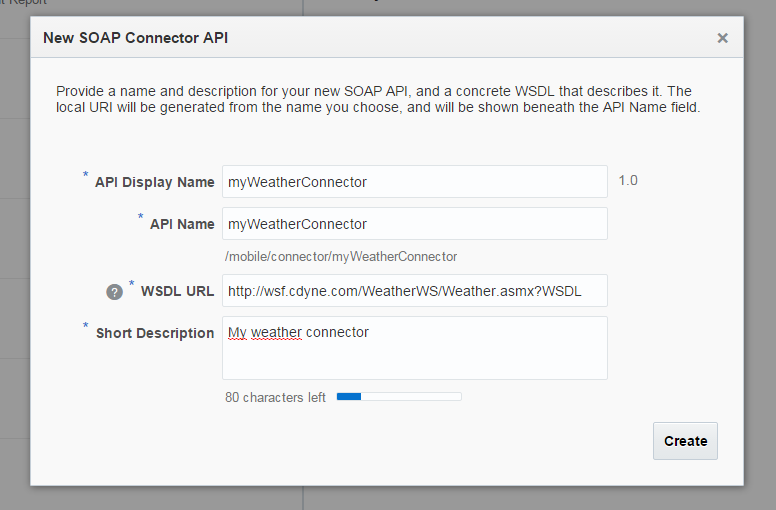
We have to head to Connectors page, click on New Connector button and pick SOAP sub menu.
In the popup we need to fill some information including the SOAP web service URL.
We are going to use a public weather service:
http://wsf.cdyne.com/WeatherWS/Weather.asmx?WSDL 

Our connector has been created. Now we can configure settings like connection timeout or add security policies.

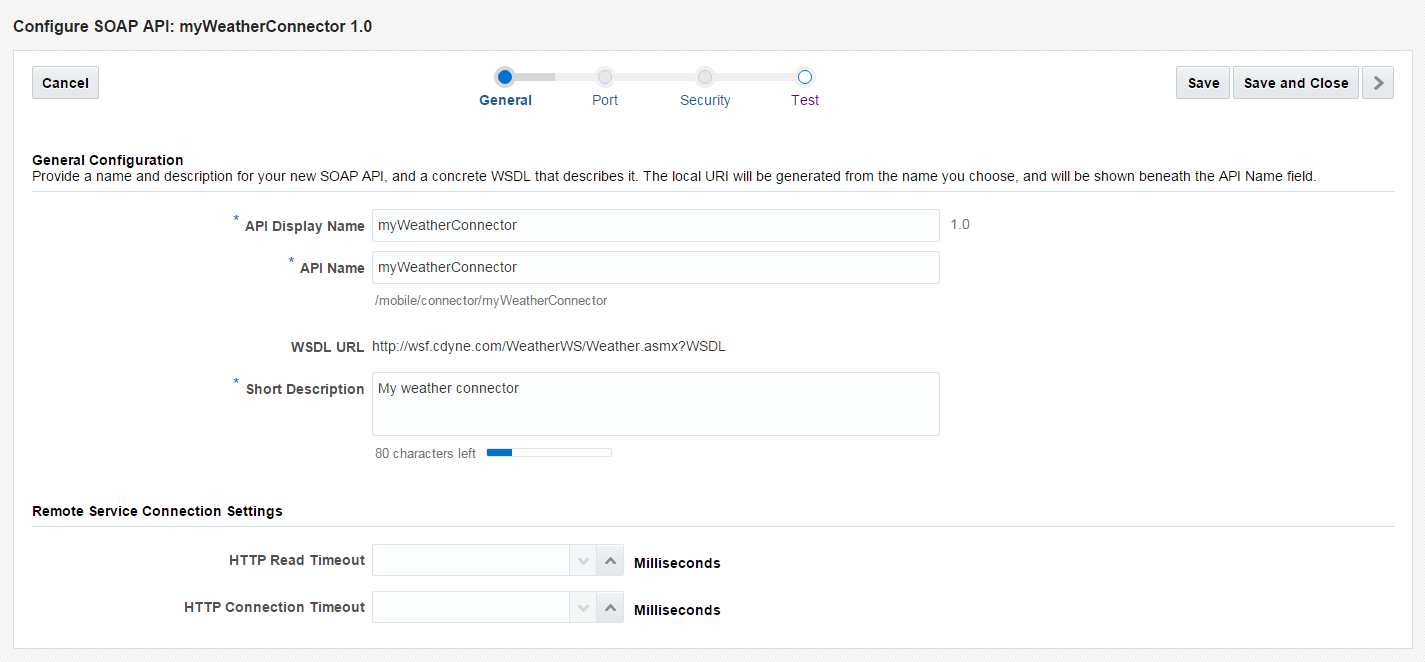
In this example we are not going to add any extra setting so we can continue to the last step, Test.
As you can see although this is a SOAP web service, the tester let us introduce a JSON payload.
This is one of the great things of MCS, the SOAP Connector uses a JSON translator and transforms automatically the JSON that we are going to use to the xml that the SOAP web service needs.

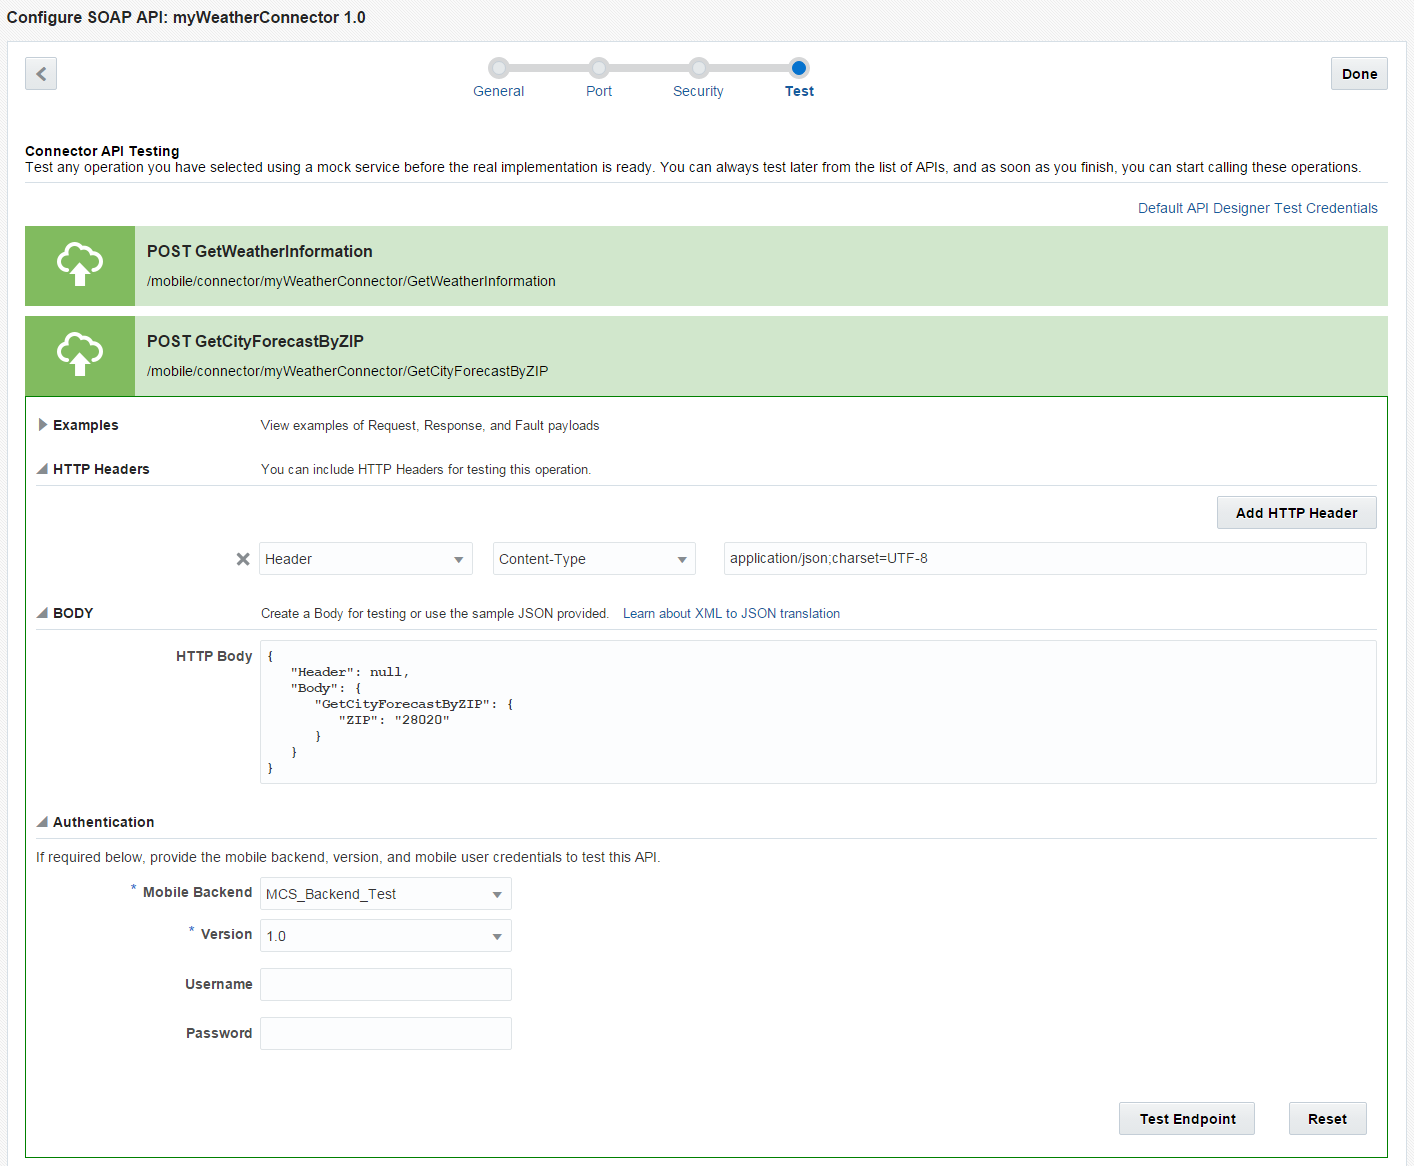
Now if we set a zip code into the JSON and click on Test Endpoint we can see that the web service returns us the weather of that zip code.

  • Create and Implement a Coustom API.

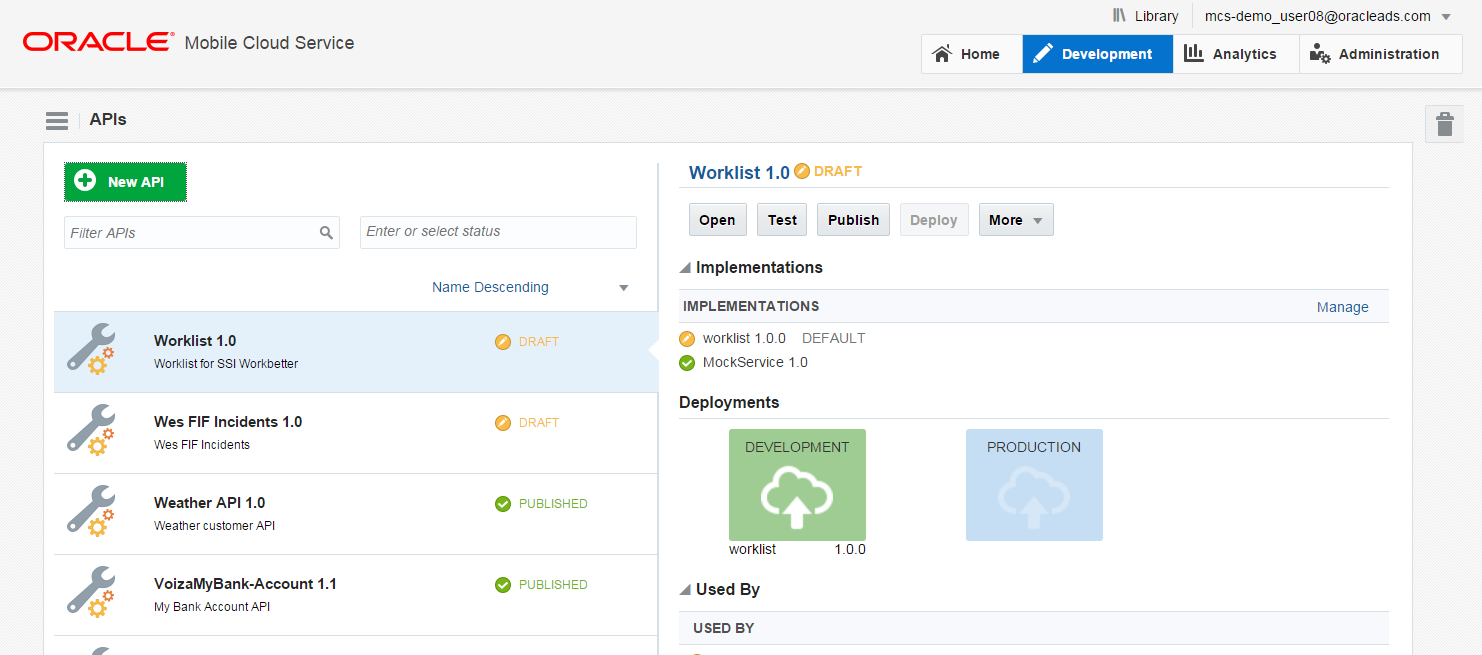
Now that the connector is up and running we need to create a Custom API that will make the call to the connector.
We have to navigate to APIs page and click on New API.

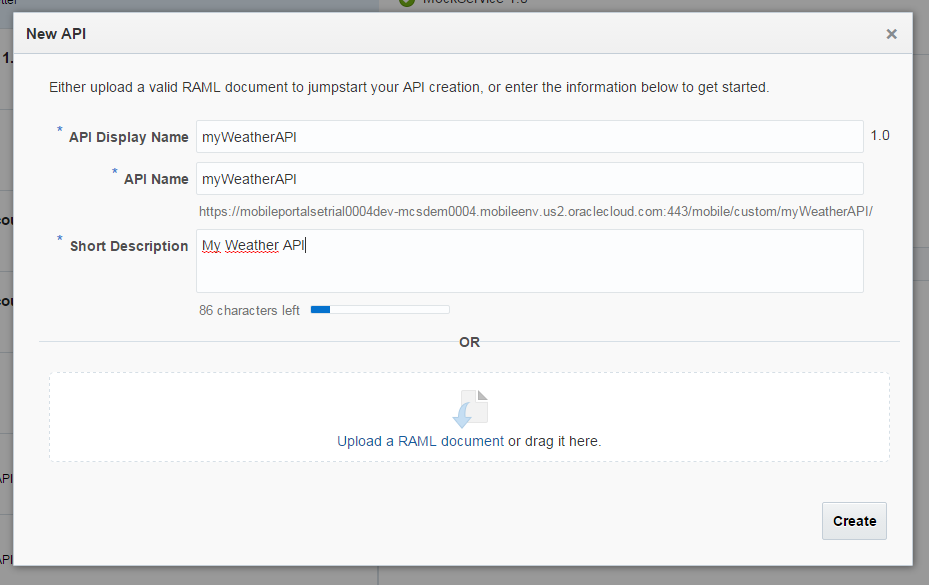
In the popup we have to fill the name of the API and a short description or upload a RAML file.

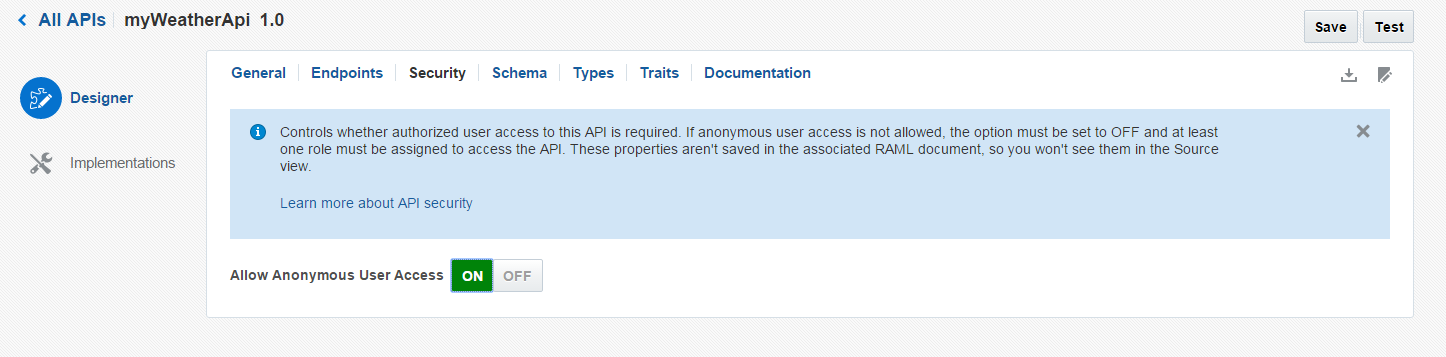
Now there is a setting we have to change in order to avoid authentication and having to create users. Head to Security option and be sure to select On  in Allow Anonymous User Access.

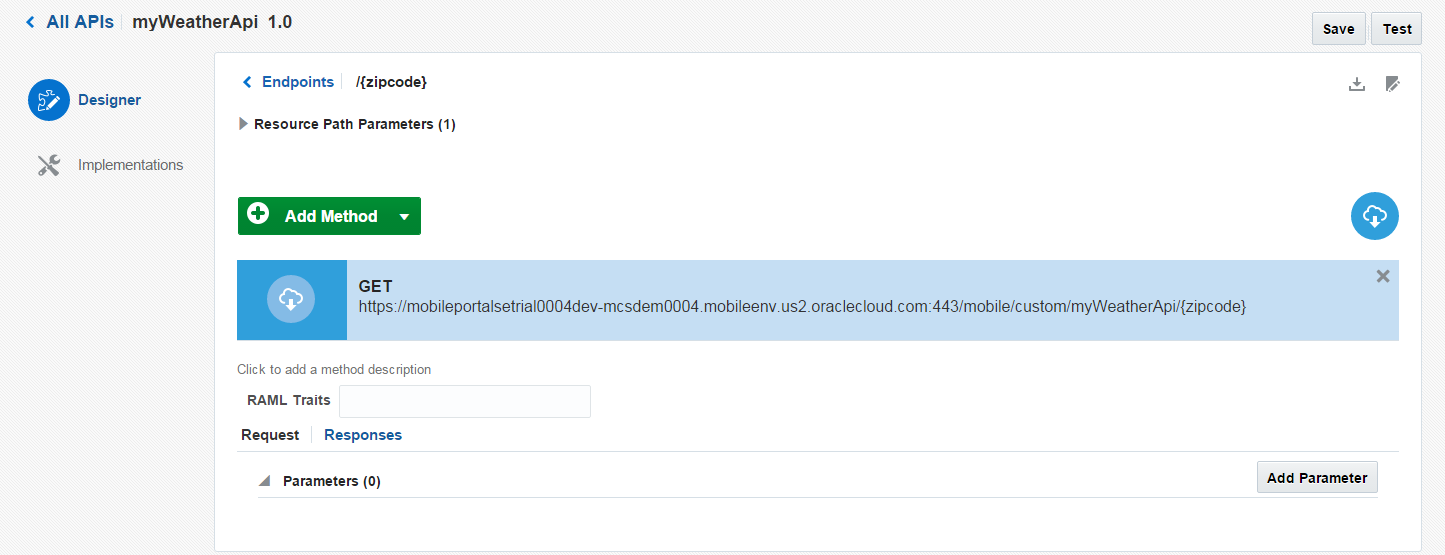
We need to create an Endpoint we click on New Resource and add {zipcode}. This is the parameter that our API will need to send it to the connector call.

After that, clicking on methods (in the right hand side) we will add a GET method.

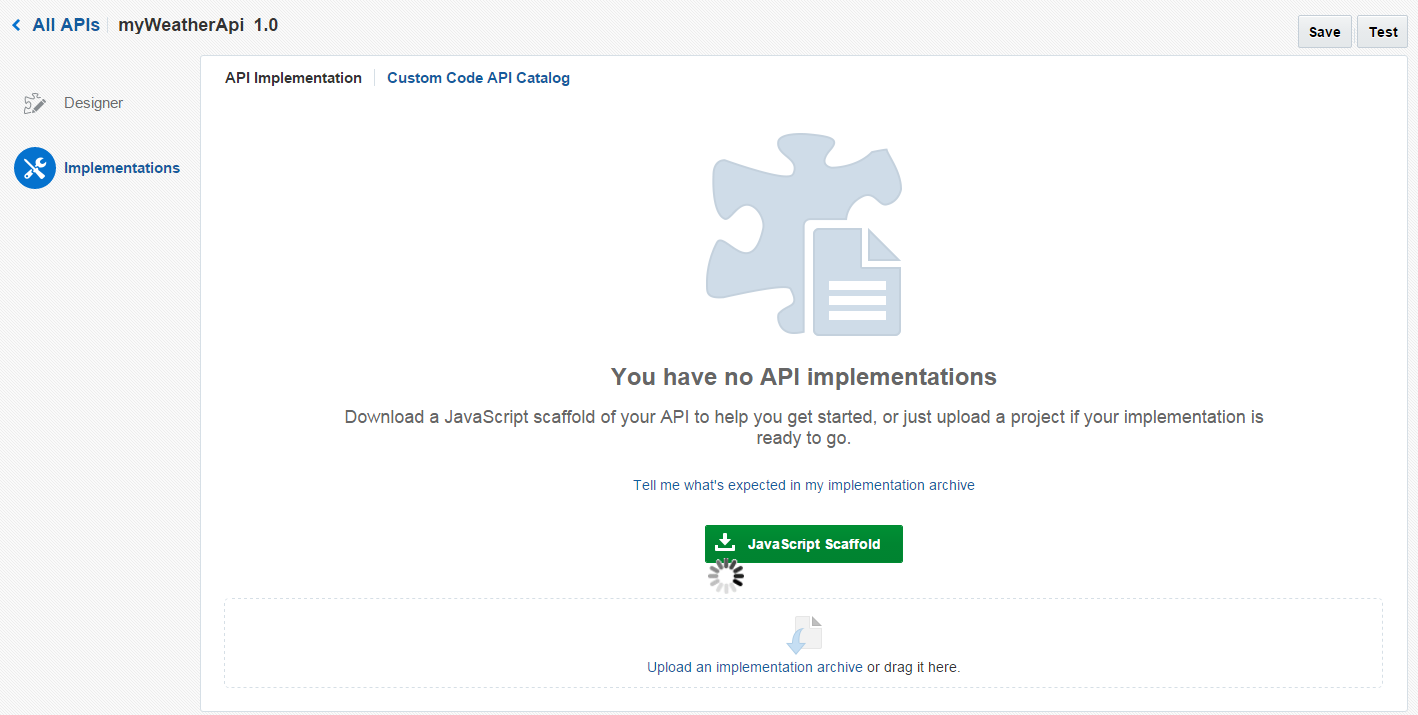
Now that we have designed the API, we need to implement it by downloading the JavaScript Scaffold.

In the zip file there are 4 files.

package.json is the file where we can set the dependencies of our API, in this case we have to add our connector’s URI.

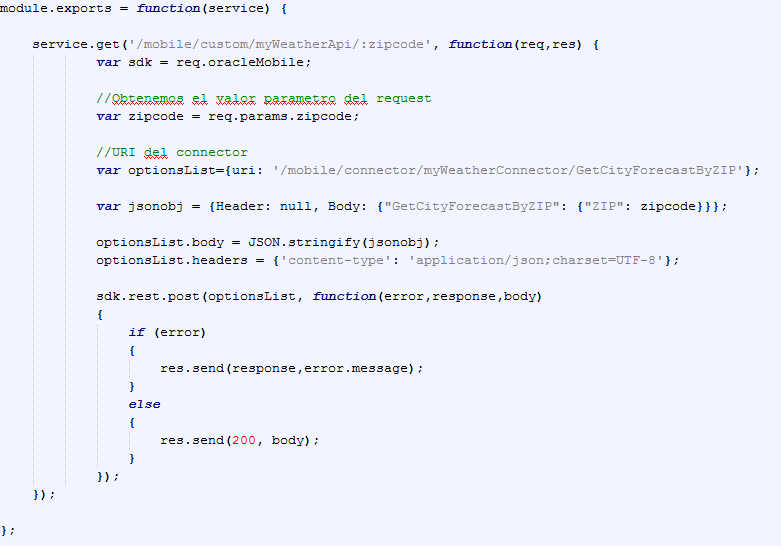
In myweatherapi.js file we have to make the implementation.
There is a couple of things that differs from the REST connector call.
  1. In the URI of the connector we also have to add the name of the method that we are going to call, in this case GetCityForecastByZIP.
  2. We need to build the JSON that we will send to the connector.
To achieve the second point we can use the example payload from the connector tester and put zipcode parameter.
After building the JSON we have to make a post call to the connector.

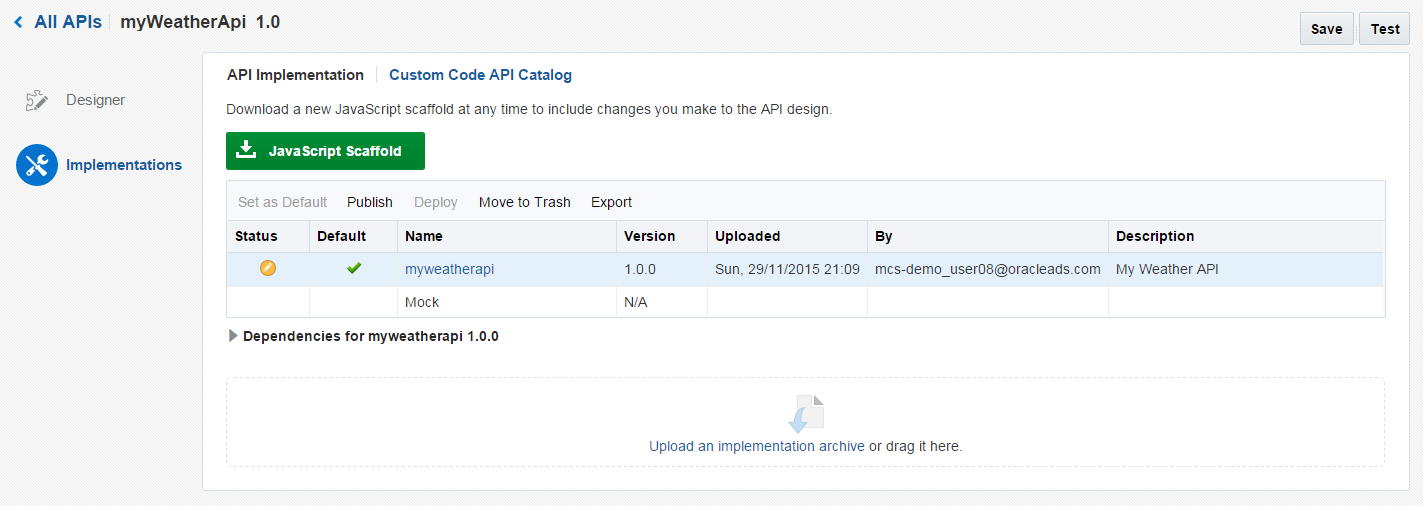
Once we have finished the implementation we have to pack the files in the same zip filethat we have downloaded and upload it to MCS.
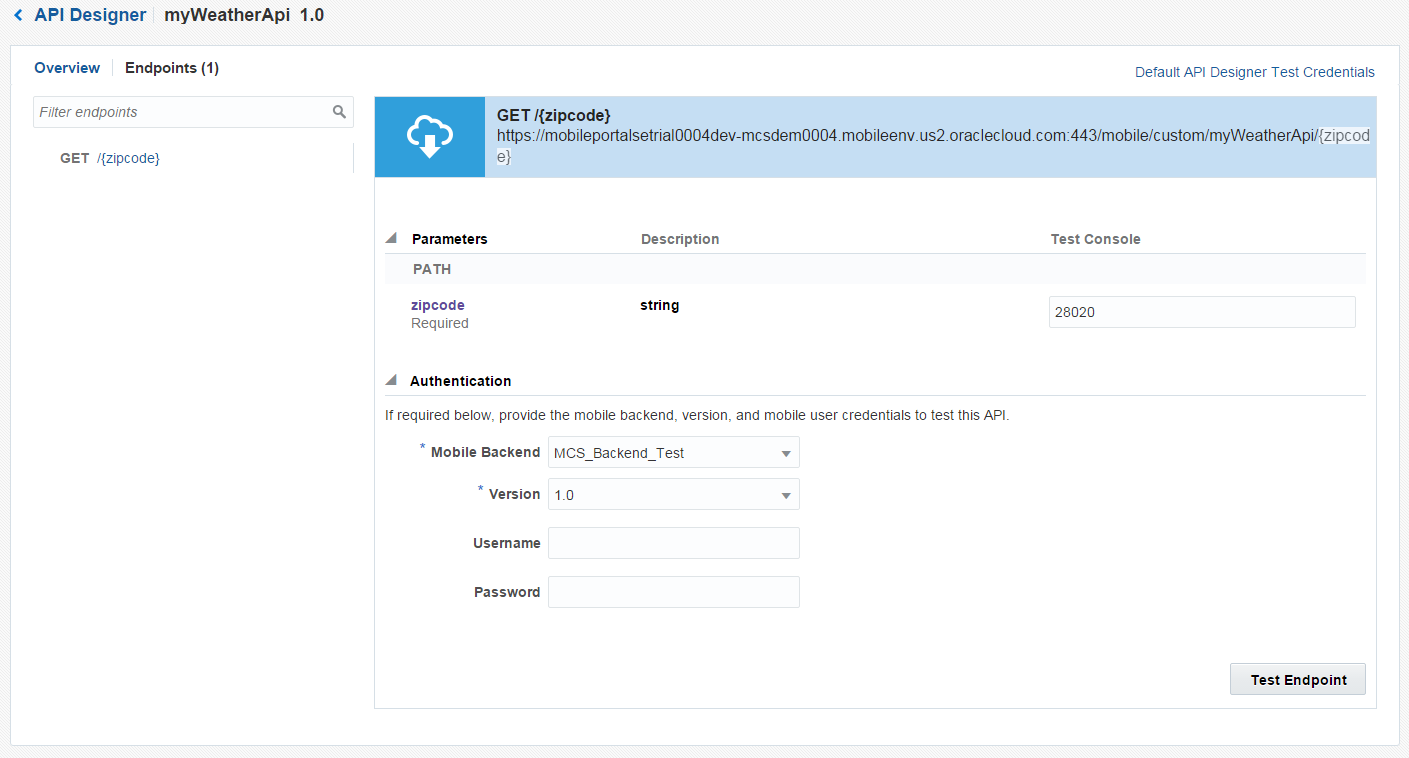
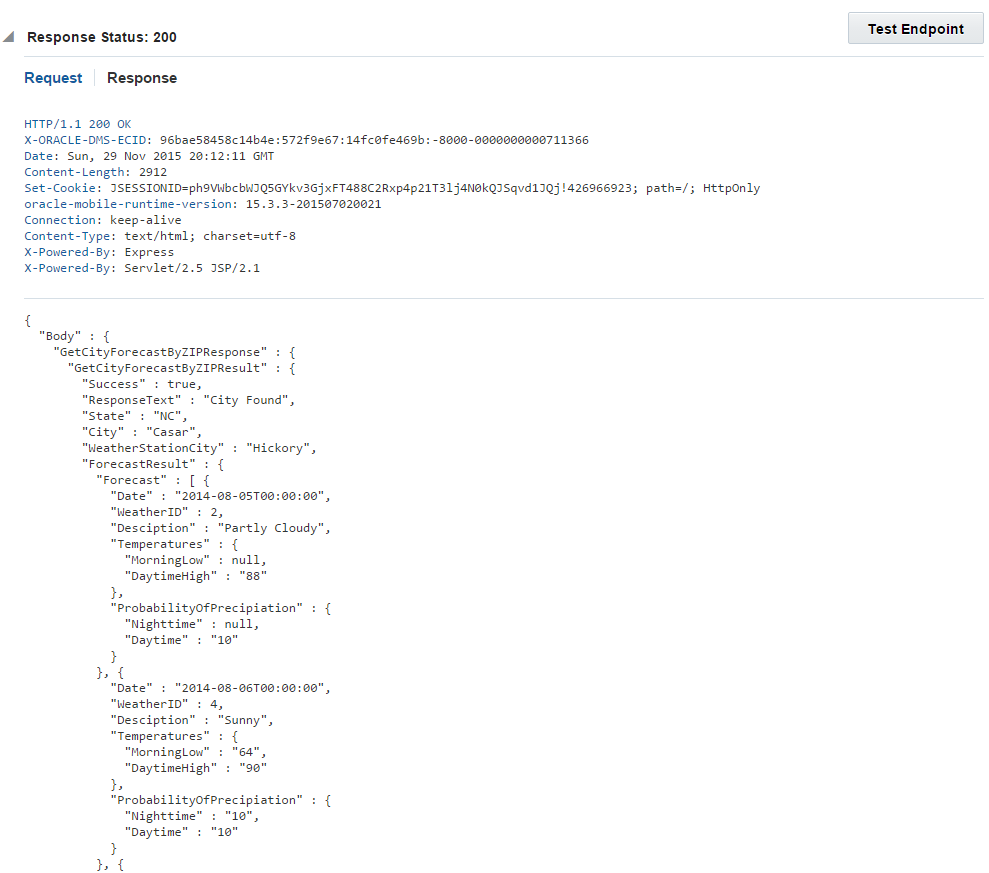
The last step is to test out API. Just type a zip code, select the MBE and version and click on Test Endpoint. You will see that the API works and returns us the weather forecast.

ADF: Display current selected node in af:tree

Some times when we want to display some master detail data we use an af:tree because it is a easy and elegant way to display data. I am going to show you how to display data of the selected node in an af:tree based on a single view object.
We are going to use this data model based on Oracle hr schema.
The first thing we have to do is drag and drop the EmployeesView1 view object from the data control palette to the page.

After that we also have to add a form based on EmployeesView. Here is the problem. What view object instance are we going to use to create the form? If we use Parent instance, although we select a child node, in the form we are going to see just the parent node data.

In order to solve this issue we are going to create a new instance of the Employees view object, in this case EmployeesDisplayVO.

The next step is to create a Action Binding with setCurrentRowWithKey operation of the new view object instance in the pagedef of our page.

The last step is to create a custom Selection Listener in our bean and associate it to the af:tree
component.

In this method, a part from ejecute makeCurrent method of the treeModel, we are going to get selected keys and execute setCurrentRowWithKey method with the selected key as parameter.

When we select the first node only one key is in the list, but if we select the second or third level we will have one key per level and we will have to use keyList.get(keyList.size() – 1) in order to get the last selected key.

If we run again the application we can se that if we select any node we can see its information in the form.

ADF: Default value when editing a row

Recently one of our customers had a need to assign a default value to a field only when editing a row. This tip show you how to achieve this behavior.

Let’s assume we have a simple task flow, as shown below:

In the first fragment we have an af:table based on Employees table in hr schema.

And in the second fragment we have a form based on the same view where we can edit selected row.


The goal is to set a different value to Email attribute when we navigate to the form. To achieve it we have to generate View Row Class in EmployeesVO.
In EmployeesVO inside ‘Java’ tab we have to click on ‘Java Classes’ edit pencil and check ‘Generate View Row Class EmployeesViewRowImpl’

Once the class is created we have add a method that will set the value to Email field.

as we want to add that field to the taskflow we need to have it published by editing Client Row Interface.

Now we can drag our method from datacontrols palette and drop it in the taskflow.


If we run again the app, select a row and click on edit button, once the form fragments appears we can see that Email field value has changed.


ADF 12.2.1: Using the Theme Editor

A couple of weeks ago Oracle released ADF 12.2.1 with many cool features and one of them is the Theme Editor. With this new tool you can change the look and feel of you application by selecting the desired style of the components and see the changes automatically right in the browser. This tool can help developers who are not experts in CSS to build applications with a great look and feel.

We have to make a couple of things in order to use the theme editor.
First we have to create a new application based on an existing EAR file.

The EAR file we are going to use is located inside our 12.2.1 Middleware Home, in my installation this path is:

After that we just have to click on Finish to create the skin editor application.
To start the Theme Editor we have to run that application by runing index.html file.

Once the application is runing we will see this:

We are going to create a new skin so we have to click on ‘Create Theme’ button. A popup will appear where we have to put the name of the theme and also select the skin we want to use. We can choose Skyros or Alta as our base skin.

Click on ‘Save and Close’ and we will have our theme created. By clicking on the right button we can for example edit, delete, duplicate or export our theme. We will come back later to export the theme but at the moment we are going to edit it.
Once you click on edit, we can see some tabs in the top of the page where wecan change property values of some components, and in the bottom of the page we have a real time preview of our skin.
A quick example of what can we do is change our buttons style.

When we have finished our skin work we have to click ok ‘Save and Close’ in the top right of the page.
Now we can use this skin in our application by exporting the theme.
After exporting the skin we can use it by importing the jar file we have just generated in our application.
We also have to select this skin as default skin by selecting it as ‘Default Skin Family’ in ‘ADF View’ menu in project proeprties.

Now if we run the application we can see that the skin that we applied in the theme editor applies to our application.
If we don’t get the look and feel that we expected using the Theme Editor we can also extend the skin we have just created and add our custom CSS rules to skin our application.
You can get more information about the Theme Editor and about using skins in an ADF Library JAR file in these links: